More and more lately bits of my Scandinavian heritage are coming out in my decorating style as I am drawn to its simplicity and muted colours. I have been using a lot of soft reds and whites the past couple of years for Christmas and am absolutely in love with how they pair with the natural elements I have throughout my home.
I wanted to share with you how to make these beautiful, Scandinavian inspired DIY Christmas signs this week. These signs are one of the holiday classes I have been teaching this year in Ottawa and since so many of you don’t live close enough to join me in a class, I thought I would post the directions so that you can make one too.
They are so easy that anyone, even if you don’t feel you are a “painter” can make one.
Start with a piece of raw wood approximately two feet long. If you don’t have a way to cut a piece to size, your local building supply store will usually cut wood for you.
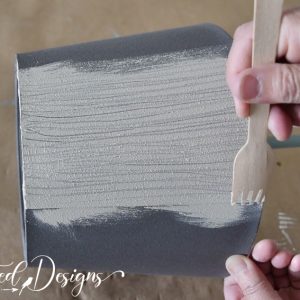
 I used this raw pine but since I wanted it to look darker, I stained it with a coat of chocolate brown coloured milk paint.
To use Milk Paint as a stain, use one part paint mix and 3 parts water. It will be very thin but works perfectly as an all-natural stain.
 I like the look of the wood so much better after the coat of stain.
Next, you want to add a backdrop for your words. I love using pure white milk paint for this step, it looks like snow ♥

When you are brushing on the white, the trick to getting that rustic look is to not go right to the edges or fill it all in. You can still see spots of dark wood peeking through the white as well as around the edges and that makes the sign look worn and old already.
The final step is to add the text. If you are as afraid to write freehand as I am, this method is for you! (or if you are a perfectionist who wants the perfect writing…)
Choose your saying and print it out on a regular printer.
 Once you have it placed how you would like it, tape it in place and slip a piece of graphite paper under the words (dark side down). Using a pen, trace the outline of each letter.

<<You can find the pattern for the script here…>>
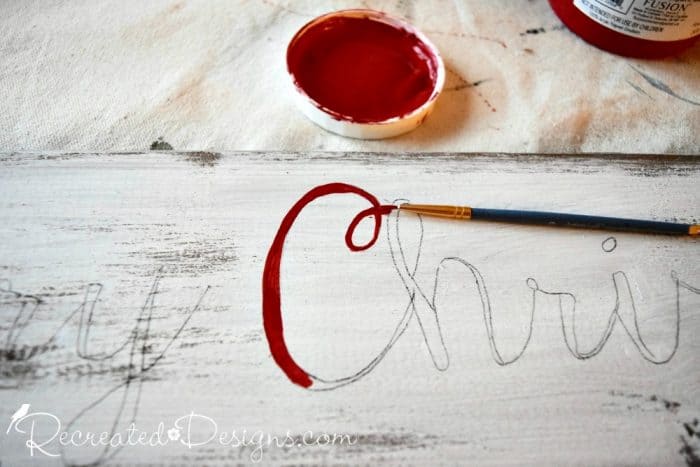
Paint over (and fill in) each letter with red milk paint using a small, thin detail brush. You may want to add a second coat once the first is dry.
Once your sign is completely dry, you can give it a light sanding to get a more aged look. You can also apply a coat of Hemp Oil to protect the paint and bring out the beautiful pigments.

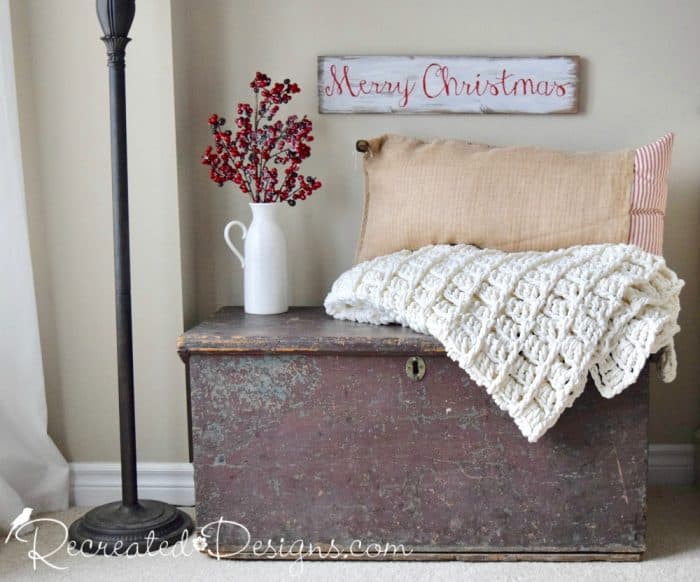
I love red and white for Christmas mixed in with all of those beautiful natural Scandinavian accents so this sign is perfect for my holiday decor.


Oh, and how lovely is that burlap pillow with the red and white ticking? I found that this past weekend at a sale I was at and instantly fell in love with it. Wait until you see the other side!
 I hope you will try your hand at this and add a little Scandinavian beauty to your holiday decor. Be sure to share a picture with us on the Recreated Designs Facebook page as I always love to see your work.
 And how could I resist sharing a pic of my handsome helper? He is always so ready (and willing!) to hop in and help out when I am shooting pictures ♥
**Please note that this post includes affiliate links for your convenience. All links are for products that I have tried and use regularly. By using the link, it in no way increases the cost of the item to you should you choose to purchase. However, by using the link, a small portion of the sale is given back to help fund this blog. Thank you! ♥**
Pin for later…


Love it!!!!! And your helper is adorable.
Thanks so much Goedele!! I am definitely showing more and more signs of my Swedish roots coming out in my decor and loving it 😉
THANK YOU!!!
You are most welcome Denice 😉 Have fun!