Last summer I had some extra drawers left over from a dresser I recreated and used them to make a bookshelf.
I loved that bookshelf. I love how unique a bookshelf made out of dresser drawers looks. Ever since I made the last one, I have been wanting one for my own house so I have been keeping my eye out for a pile of lonely, dresser-less drawers.  Guess what I found on the side of the road recently? 6 dresser drawers! I don’t know what happened to the dresser, but lo and behold there was a pile of drawers just sitting, all by themselves, on the curb. They were exactly what I have been waiting for so I hauled them home to make myself a bookshelf.
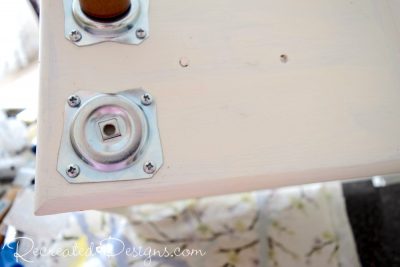
  To prep the drawers before painting, I removed the hardware and filled in the holes. Once the filler was dry and sanded smooth the holes were invisible and they were ready for paint.
Painting
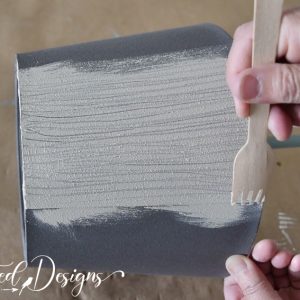
I wanted this bookshelf for my living/dining room area so wanted a nice, clean, neutral colour. A custom mix of [easyazon_link identifier=”B00WNCTL2Q” locale=”US” tag=”recredesig20-20″]Fusion Mineral Paint in Picket Fence[/easyazon_link] and [easyazon_link identifier=”B00O2JNZ98″ locale=”US” tag=”recredesig20-20″]Casement[/easyazon_link] was the quintessential creamy white for the job.
Each drawer was painted individually before they were attached together.
Attaching Legs
 I dug through my collection of salvaged legs and found these long beauties. Their slim line and simple design made them the perfect complement for the narrow drawers.
To attach them to the drawer that would become the bottom one, I used these [easyazon_link identifier=”B01HTWQFKA” locale=”US” tag=”recredesig20-20″]nifty little metal plates[/easyazon_link] you can get at Home Depot. They were super easy to attach… just make sure that you place them at the correct angle you want the legs to go 😉 (I may or may not know this tip from attaching them incorrectly the first time!) Once the plates are in place, you just screw the legs into them and they are sturdy and held securely in place.
  The legs also got two coats of the Fusion paint mix after they were attached.
Putting the Bookshelf Together
 After laying the dresser drawers in the order I wanted, I applied some wood glue between them to attach them to each other. Unlike the last shelf, I didn’t use any screws because of the spaces between the drawers.
Each of the drawers had a little lip at the back and I’m so glad they did! The little lips created a lovely little space between each shelf which added even more charming character. 
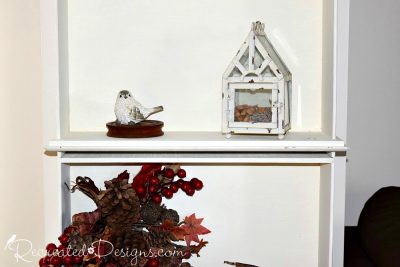 These drawers turned out to be the perfect width for my space. I wanted the shelf to sit up against a small wall that divides the space between my dining room and living room and they are exactly the right size.
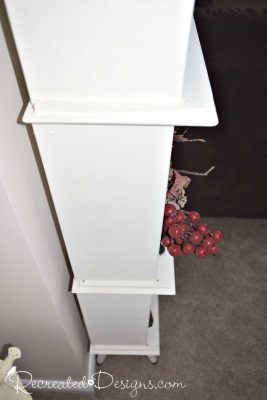
 Because the new bookshelf sits on carpet, once it was in place, I finished it by putting a screw through one of the bottom shelves into the wall. This gives me peace of mind knowing it won’t topple over!
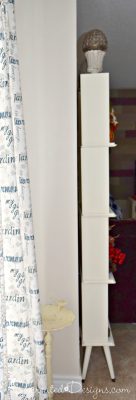
 I am so glad I saw that stack of dresser drawers that morning. I now have a unique bookshelf that cost me under $10 to make and fits perfectly into my space.
**Please note that this post includes Affiliate links, for your convenience, for products that are used in this project that I have tried and use regularly. By using the link, it in no way increases the cost of the product to you should you choose to buy. However, by using the link, a small portion of the sale is given back to me to help fund this blog.**


What a neat creative idea!
Thanks so much Jeanne!
LOVE this! So much lighter-weight than regular bookshelves! Personally, I’d have another screw in the top on. I worry about things LOL
🙂 Thanks Jeannie! And I hear you about the screws… I debated adding another one (if not a few) but because it’s not in a high traffic area and I have no kids around I stuck with just the one… so far 😉
This is great!
Thanks Sheila!
There are so many great uses for old drawers! Thanks for this inspiring project, and reminder to never overlook old drawers.
It’s so true isn’t it! I have seen some really cool projects with old drawers so I never pass them up when I can find them now 😉
Hi, I'm Lisa!
Welcome to Recreated Designs... A place for you to find endless upcycling ideas, unique ways to use vintage finds and oodles of helpful tips and tricks for painting, crafting and recreating. I am so happy you are here and can’t wait to see what you create!
Continue reading about me here!