If you have followed along my journey for very long you will know that one of my favourite places to find items to upcycle is at the dump – and it’s not as yucky as it sounds 😉 (see some of my previous finds here…)
A lot of the dumps around our area have buildings where you can leave items that aren’t ready for the trash and anyone can take the items for free! It’s amazing.
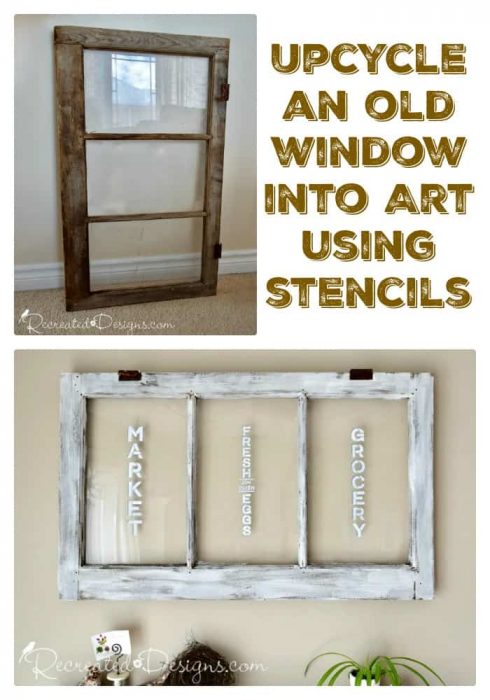
The Window
I find some pretty amazing pieces at the dump and last summer I found this old, vintage window. One of the panes is actually broken but that doesn’t bother me. The old wood just has so much character and the hinges are so perfectly rusty that the broken parts just add to the charm. I knew when I grabbed the window I might not use it right away but eventually, I’d find the perfect upcycle project for it. And, when Stencil Revolution contacted me about trying their stencils, the window instantly came to mind.
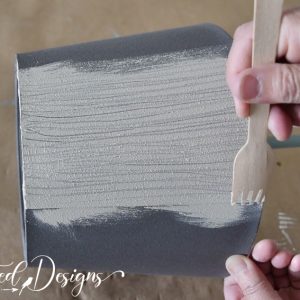
To prep a window for this type of project, it just needs a little cleaning. The panes can be cleaned with simple soap and water and the wood with a wire brush to get off all of the dirt and grime. To lighten up my window a bit, I also dry brushed it with a little Fusion Mineral Paint in Casement.
The Stencils
Since I had the window in mind for this project, I chose three vertical stencils, one for each pane, from Stencil Revolution.
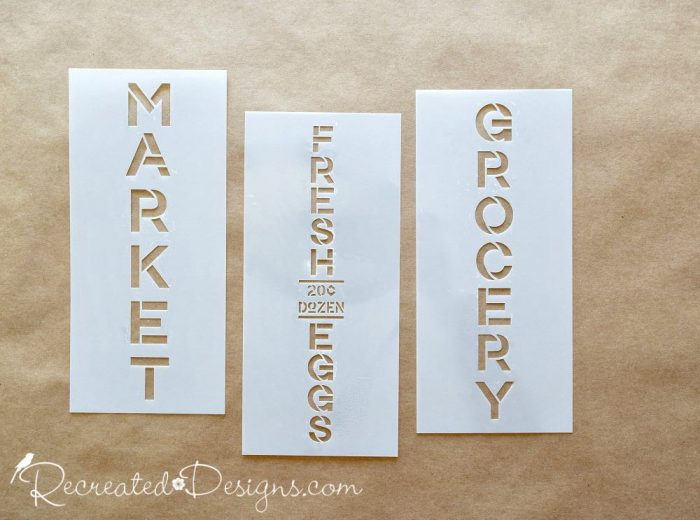
When stencils are put on glass, I like to highlight the wording so they don’t get lost on the wall behind when it’s hung.
It is really easy to make a stencil look like you outlined each letter without having to do it freehand. You can see a previous project where this was done here…
Making a Multidimensional Stencil
To start, line up your stencil, slightly to the left and above, where your final word will go.  Using a densely bristled stenciling brush, stencil the word using a dark colour. I used Fusion Mineral Paint in Ash for my background colour.

When the darker colour has dried, place the stencil on top and move it slightly down and to the right.  Keep in mind that if your stencil has different sized fonts as the one below, you will need to do each section separately. The smaller lettering will need a smaller shift of the stencil than the larger letters will.
  Once your paint has dried, you will have created a small outline around each letter that will highlight it and add a faux depth making them appear multidimensional.
  The darker paint behind and around the lettering definitely makes a difference when you hang your new piece. It really makes the words pop off the wall.
Farmhouse Inspired Art
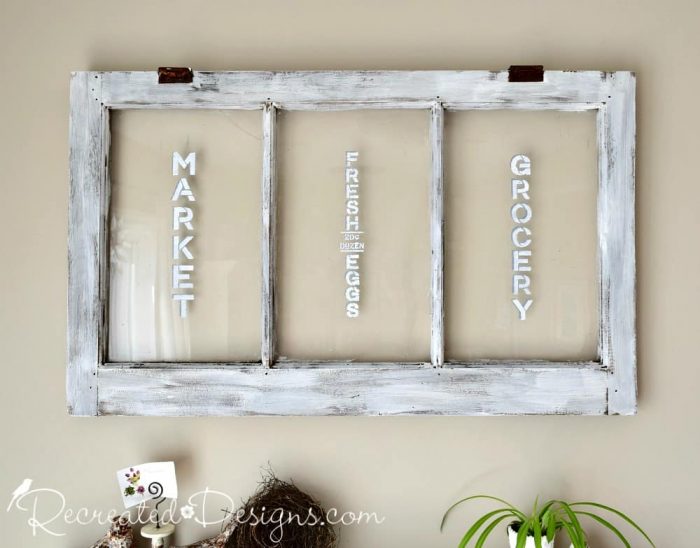
 I am so glad I grabbed this window when I saw it and saved it until the perfect project came along. It now hangs in my kitchen/work area and just adds to the Farmhouse charm.
  Find the directions to the Farmhouse kitchen planter from the photo above here…
A huge thanks again to Stencil Revolution for providing the stencils for this project! They were perfect!
**Please note that this post includes affiliate links for your convenience (only the paint/brush links). The links are for products that I have tried and use regularly. By using the link, it in no way increases the cost of the item to you should you choose to purchase. However, by using the link, a small portion of the sale is given back to help fund this blog. Thank you! **
Pin for later…