Last June when I was at the Country Living Fair in NY, I had a little extra time to peruse some of the antique markets in the local area. Being in an older area of the United States, they were packed to the brim with amazing things. Some of the shops and barns even had sections of free things!
In one of the shops I was in, I found a beautiful, old, wooden picking basket. It was a gorgeous colour and size and yep… it was in the free section. I grabbed it quicker than was probably necessary 😉 and put it right into my car. (Didn’t want to risk loosing that gem!)
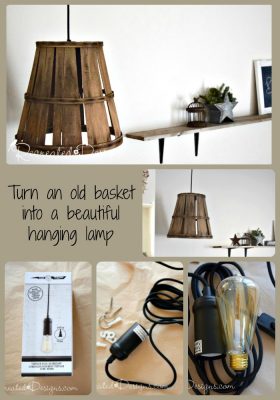
Fast forward a few months and as I was working on my Living Room re-do I pulled out the old basket. It was exactly what I needed to light up one corner. I turned it into a hanging lamp and it couldn’t have been easier.
Here is how to turn just about anything into a hanging lamp… 
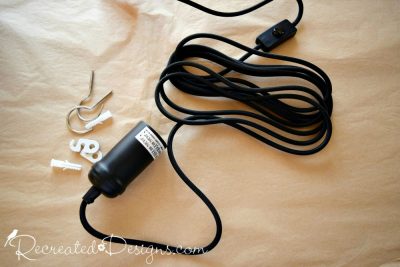

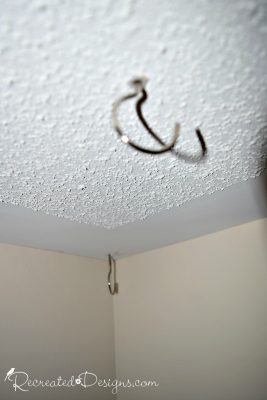
Once the plugs were in, I screwed in the hooks and that was all I had to do. 

Oh, and I have no intention of painting the basket… it is just too pretty in all of its natural glory. This is one time my paintbrush can stay put on its shelf 😉
Pin for later… 
**Please note that this post includes affiliate links, for your convenience, for products that are used in this project that I have tried and use regularly. By using the link, it in no way increases the cost of the product to you should you choose to buy. However, by using the link, a small portion of the sale is given back to me to help fund this blog.**
Save


I love that look! I am planning on making something similar so this is a great reference!
Thanks so much Julia. It was such an easy way to make a light and love the texture and light it gives off. Have fun with yours!
Love this. Have lots of objects I would like to turn into hanging lamps.
Was hoping you would cover how the lighting fixture attaches to the basket (I’m guessing it goes through a hole in the base of the basket) and how to hide the cord that leads to the electrical outlet.
Also, I’m mot sure what a “plug” is; is it the hook in the ceiling?
Thanks!
Thanks so much Lauren. I know what you mean… there are so many great things that could be turned into lights! To get the light fixture through the basket I did have to drill a hole into the bottom of the basket. I then held it in place with several spacers that came with this particular kit. The plug in the ceiling is one that you put in drywall so that the hole doesn’t keep getting bigger on it. I usually pop one into the drywall before I put a screw in the wall/ceiling. It will insure that the screw doesn’t pop out at a later the date. With this cord I didn’t do anything to hide it since it was a fabric covered cord and I liked the look of it. You can create a cozy for cords though that make them look a lot better. Almost like a really, really long scrunchy that you can thread over the cord. Hope that helps a bit 😉
Lisa, is there something you have to do to the basket so it doesn’t catch fire from the bulb?
Hi Tina, My basket is big enough so that it isn’t close enough to the bulb to make it hot. I have checked a few times and the basket has never been warm. I think it would completely depend on the shape and size of your basket.
I’ve seen many of these, but this basket is THE BEST! Love it!
Thanks so much Julie, that is so sweet.
Wow! This hanging basket light is awesome! Love this!!
Thanks so much Keri <3
I adore this! Pinned and sharing 🙂
That is so sweet Angie 😉 Thanks so much!
I have this on my list for a while now and I really really love the basket you used for this, it’s perfect and so super pretty! That must have been one amazing fair to go to! Thank you for sharing at Sweet Inspiration, have a lovely week!!
I am so in love with this basket too! The age, the colour, the lines… it all makes me smile every time I look at it <3 Thanks so much for taking the time to stop by!!
Hi Lisa . First I think it’s awesome that you got that for free. Good job. Loved what you did to the basket. Always wanted to know how to do that. Now I know thanks.
Thank you Mary and you are so welcome 😉 I continue to love, love, love this lamp in my Living Room.
Super cute project! I really love the look of Edison bulbs, and using an old basket as a lamp is such a neat idea!
Thanks Natasha! I love the look of Edison bulbs too and with the basket over it, it just gives off such a pretty glow to the room when it’s on.
I really like the way this looks! Now I’m going to be on the hunt for a perfect basket!
Thanks Aliza! I am so in love with this lamp and it throws off just the perfect amount of light for the space. Have fun 😉
I am SWOONING! I truly need and want to make at least 3 of these. That basket shape is perfection!
I’ve featured you this weekend on DIY Salvaged Junk Projects 364. Thanks for linking up! 🙂
Aww thanks Donna! I am completely in love with this basket too! I absolutely love the warmth it brings to the room. Thank you so much for the features! Have a wonderful weekend.
Hi, I'm Lisa!
Welcome to Recreated Designs... A place for you to find endless upcycling ideas, unique ways to use vintage finds and oodles of helpful tips and tricks for painting, crafting and recreating. I am so happy you are here and can’t wait to see what you create!
Continue reading about me here!