Every spring since 1953 Ottawa has had an amazing tulip festival. Thousands and thousands of tulips emerge along the canal and the city becomes a riot of colour. The bulbs are a yearly gift from the Netherlands after Ottawa provided refuge to some of the Royal family during WWII. (read more about the history here…)
I have always had a fondness for tulips and it is likely, in part, due to this stunning festival.
The Tool Caddy
When I saw Annie Sloan’s Dutch Tulip decoupage paper last year I knew I had to create something with it this spring to celebrate this wonderful flower. As luck would have it, I found 2 of these wooden tool caddies recently in the basement of the shop (it’s a treasure trove of goodies down there!).

The ends of the caddy are the perfect size for the beautiful tulips on the decoupage paper.

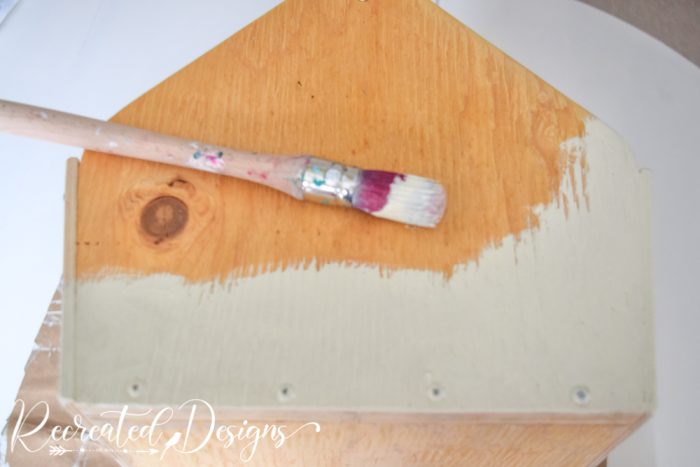
To give the tool caddy a fresh look, I started by using cream-coloured paint on the entire box; inside and out.
Adding the Decoupage Paper
Next, it was time to add the decoupage paper to the ends. The paper comes in fairly large sheets, so I needed to manipulate it a bit to make the tulips fit onto the caddy ends.
When working with decoupage paper, I don’t like harsh lines so I used a small paint brush and water to “cut the paper”. I go over the area to be cut several times and then once the water has soaked into the paper, it can gently be pulled apart.

The water “cutting” method allows for softer edges and I find I get a better overall look at the end as opposed to cutting with scissors.

After resizing the paper, I laid it out and found a good arrangement before gluing it down.

Once I knew where each piece was going, I applied a thin layer of Transfer Gel to the end of the caddy and laid the paper on the Transfer Gel. I continued doing this until the wood was covered.
Smoothing out the wrinkles is easy with a wadded piece of plastic wrap. I also find that lightly misting the paper with water also helps to keep it looking nice.

After the paper was completely dry, I used a sanding block to remove the excess paper.

This method creates a nice, clean line along the edge.

Giving the Tool Caddy a Wash
Once I had the paper adhered to the ends, I found the cream paint to be a little bright so I ended up doing both a grey and a brown wash over the cream. A wash is a little bit of paint mixed with water and wiped or painted on the surface. It is then wiped back with a lint-free cloth.

The wash was added to the edges of the paper as well to give it a well-worn (and loved!) feel.

Adding the Script
You can see below what a difference the grey and brown washes made. The box took on a whole new look and definitely gives off antique vibes now.
To give the sides a little sprucing as well, I added some script. I add script this way all the time and it is incredibly easy. For the full directions on how to add script, see this post here…

This is the final script once it was painted in. I did it on both sides of the caddy.

I am so glad I found this tool caddy in the basement. It turned out to be the perfect piece to use the tulip paper.


Now it’s truly time for spring and the tulip festival.

Have a lovely Sunday and enjoy the amazing changes this season brings 🌷
Please note that this post contains links to the Recreated Designs shop.