This broken lamp was a freebie that someone was getting rid of because it’s base had a missing leaf and the shade was a tangled mess of missing beads and strings. If you know me at all, you know broken doesn’t scare me 🙂 I gladly accepted it and knew that with it’s pretty lines and shape, it could be something beautiful again. 
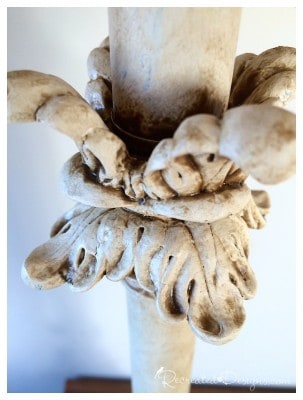
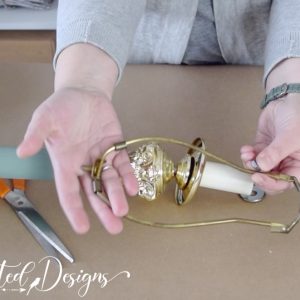
 Before I could recreated the lamp, I made a few minor repairs. There was no real way to fix the broken leaf on the base so I just broke off the other three with a pair of pliers. I knew once the base was painted, you wouldn’t notice that the leaves weren’t compete so it was the easiest solution.
 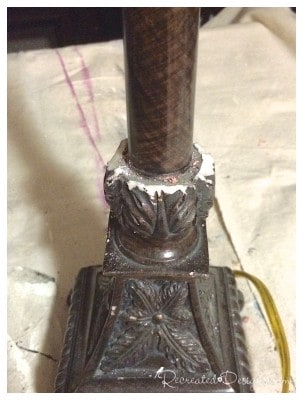 As for the lamp shade, I trimmed off all of the beads and strings and kept them to use for a future project.
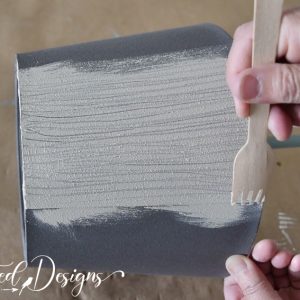
  Since the lamp had a very “old world” feel I wanted to make it looked aged. I began by putting a coat of Fusion Mineral Paint in Champlain on the lamp base. Fusion Mineral Paint is very smooth so it was perfect for getting into all of the nooks and crannies of the details.

 The base coat of Fusion Mineral Faint was a little too white for the look I was going for so I mixed up a more antiquey colour using Annie Sloan Chalk Paint. I made a mix of Cream and Coco and it was the perfect colour. The Chalk Paint also has a little more texture to it and added to the worn feel.
 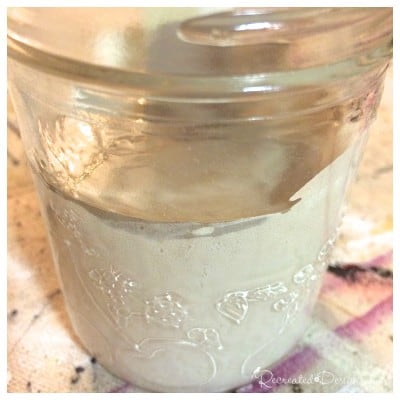 After applying the coat of Chalk paint, I started to apply Fusion Mineral Paint Antiquing Glaze. I loooove this glaze!! It goes on so beautifully and has a long “open” time so you have plenty of time to work with it on a piece.
  I brushed the glaze directly over the paint and then lightly began wiping it back with a piece of cloth. I wanted the glaze to really sit in the low spots to make it look like it had built up there over the years so only wiped the high points of the lamp base.
 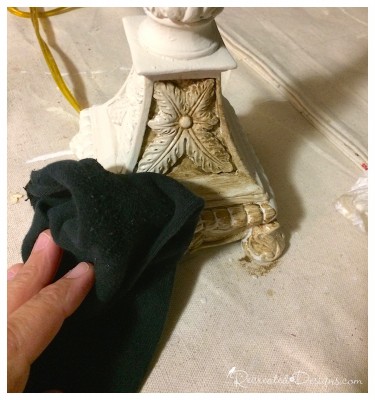 The glaze added the perfect depth and dimension that I had been looking for and I absolutely love how it brought out all of the gorgeous details.
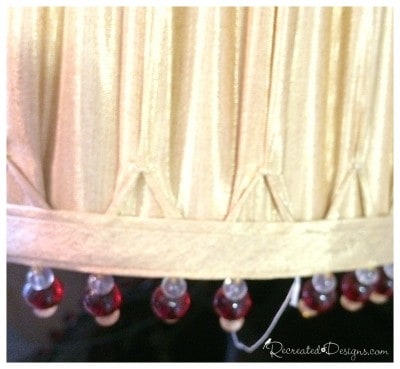
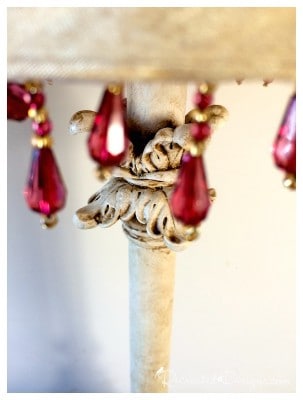
  Wanting to add a little colour, I had so beautiful ruby beads left over from another project that were perfect to add to the shade. The shade itself had been in great condition, except for the beads, so I wanted to reuse it if at all possible.
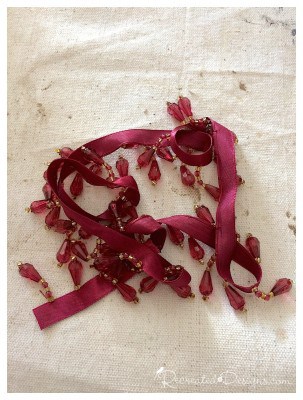 A little hot glue attached the ribbon of beads to the bottom, inside edge of the lamp shade perfectly. By adding them to the inside, I was able to hide the glue and the ribbon and just highlight the pretty beads.
  Once the base was painted and glazed, and the beads were attached to the shade, the only thing left to do was put the no-longer broken lamp back together 🙂

 I am so happy that this lamp didn’t end up in the trash as there was so much life left in it!

Such a lovely lamp! Thank you for sharing. You are one of the features at this week’s Make it Pretty Monday party at The Dedicated House. Here is the link to this week’s bash! http://www.thededicatedhouse.com/2015/12/make-it-pretty-monday-week-161.html I hope your week is merry and bright! Toodles, Kathryn @TheDedicatedHouse
Thank you so much Kathryn such an honour to be chosen! I will stop by for sure… I always love stopping by and seeing what everyone has been up too 🙂 Have a lovely holiday season! Hugs, Lisa
I love what you did to this lamp! I like it much better than before!
Thanks 🙂 Me too for sure! I love how it turned out with the glaze and how old it looks now… definitely on my favourites list 🙂
Hi, I'm Lisa!
Welcome to Recreated Designs... A place for you to find endless upcycling ideas, unique ways to use vintage finds and oodles of helpful tips and tricks for painting, crafting and recreating. I am so happy you are here and can’t wait to see what you create!
Continue reading about me here!