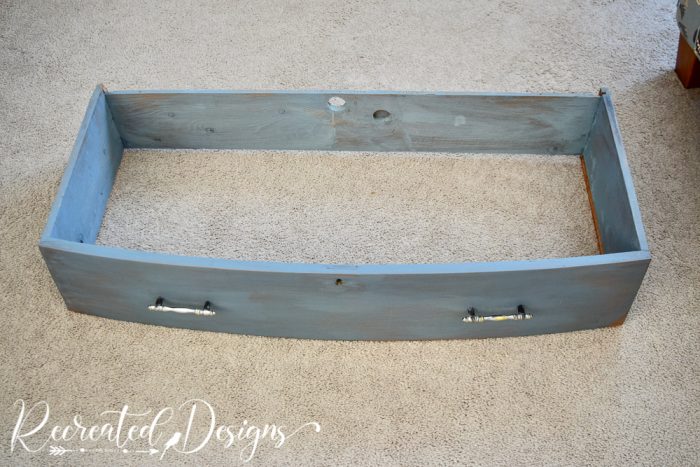
Do you remember that dresser I turned into my tv stand last week? Well, I couldn’t let the broken drawer that I removed go to waste! I decided the dovetails and wood were just so pretty they deserved another life.
The Drawer
The drawer was quite large. The base became the shelf for my cable box, apple tv, etc… in the tv stand and this is what was left.
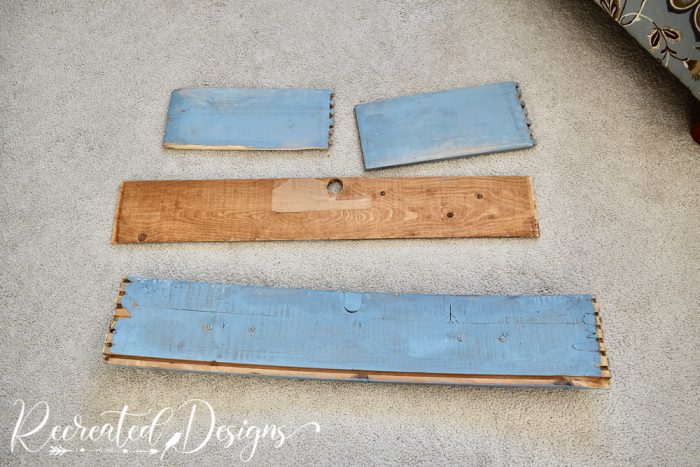
I used a hammer to take the sides apart and this is what they looked like after… everything I love… old, broken, and chippy. They were perfect.
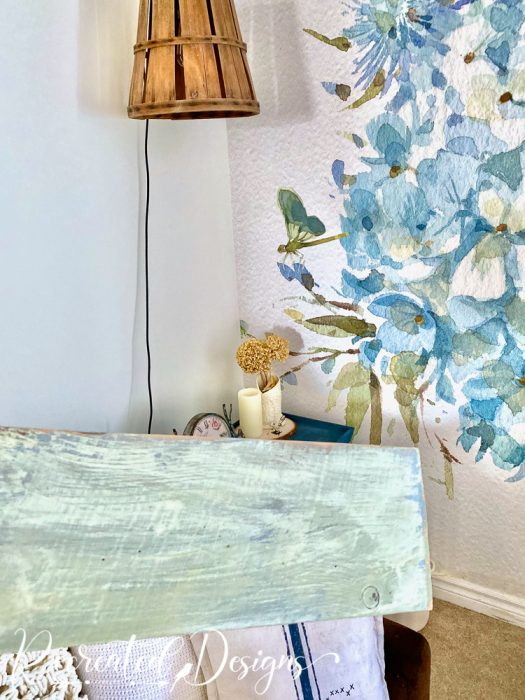
After painting one of the living room walls, I needed to add some shelves back to finish off the space. The drawer pieces were exactly what I needed.
Placing the Shelves
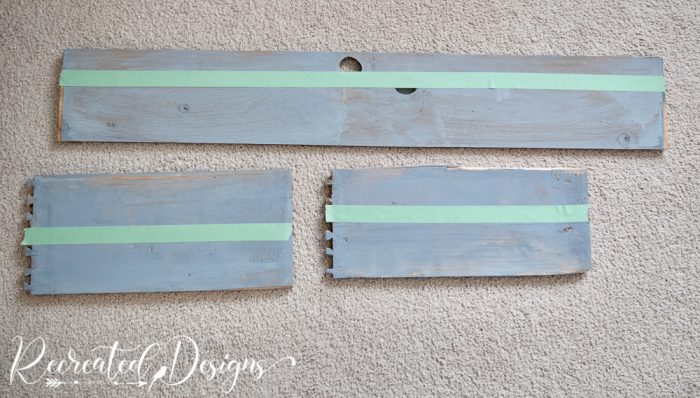
I previously had one long shelf above my couch but always felt it left the rest of the wall a little too bare. Loving the idea of multiple shelves, I decided to use the three flat sides from the drawer.
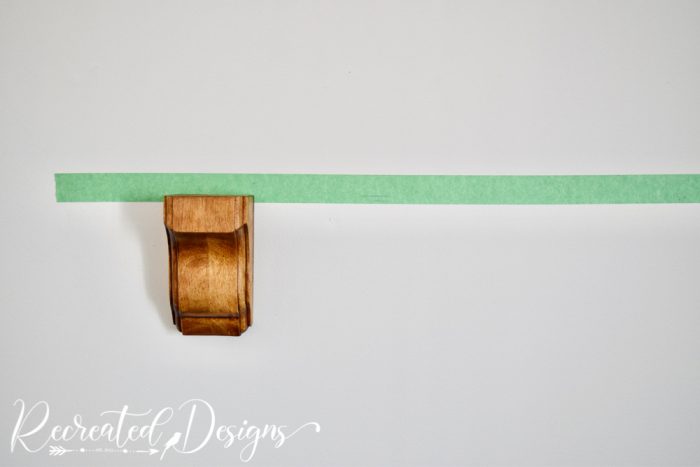
Hanging multiple shelves on a wall can be a bit tricky. I find It easiest to always plan out where they will go before you do any drilling. Start by measuring out a piece of painter’s tape the same length as each piece of wood.
Then move the pieces of tape around the wall until you get a look and flow that you like. If your shelves have corbels, you can even add those in tape to give you an exact copy.

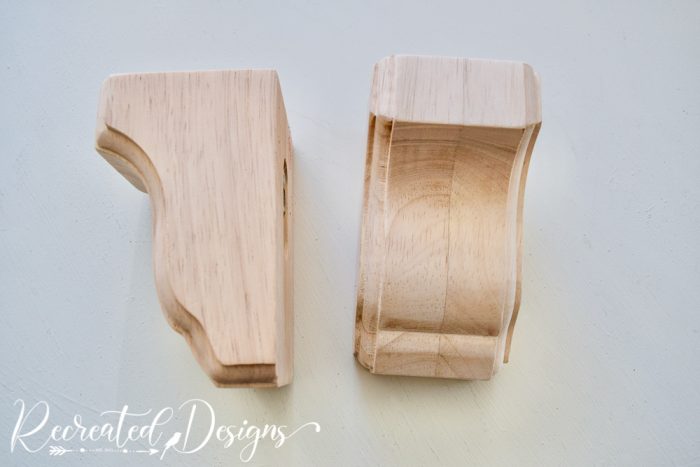
The Corbels and Wood
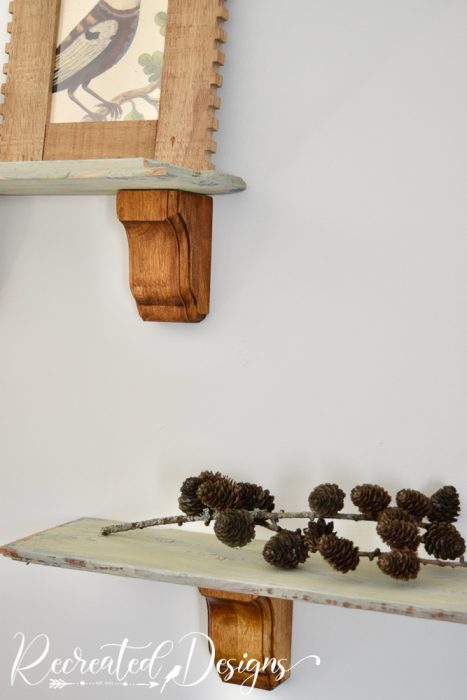
To give my new shelves a little bulk, I added 2 of these inexpensive corbels to each one.
The corbels came unfinished but it was super easy to give them a worn, vintage look. I rubbed on some Fusion Stain and Finishing Oil in Golden Pine and that was all they needed.
Wanting to tone down the blue paint on the shelves, I gave them a coat of Milk Paint by Fusion in Vintage Laurel. I am so in love with this soft green (and the blue peeking through) as it played off the colours in the wall mural beautifully.
Putting the Shelves Together
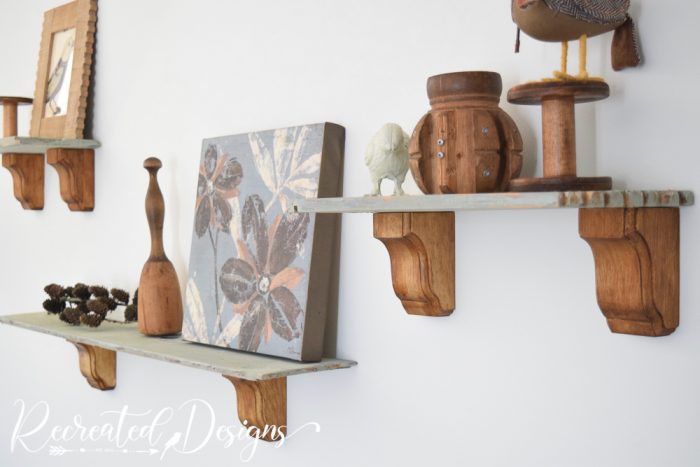
Since I was building the shelves from scratch, it was easiest to hang the corbels first and then add the wood. It was so much quicker doing it this way as I didn’t need to worry about getting screws in the exact right spot.
To finish the shelves, I laid the wood on top, made sure it was level and spaced evenly, then screwed it to the corbels.

These pretty shelves were so easy to make and hardly cost anything. If you need some in your home, I would encourage you to look around and see what you have that you can use.

I am so happy to have the living room completed and feel like these just add the finishing touch to the space.

**Please note that this post includes affiliate links for your convenience. All links are for products that I have tried and use regularly. By using the link, it in no way increases the cost of the item to you should you choose to purchase. However, by using the link, a small portion of the sale is given back to help fund this blog. Thank you and Happy Creating! **
Pin for later…


Great idea. I have some teak drawer fronts that would work perfectly.
Thanks so much, Michelle! I am so glad I didn’t have to throw the drawer out. It was beautifully made and so old.
Beautiful!!!!!
Thanks so much Beverly!
Hi, I'm Lisa!
Welcome to Recreated Designs... A place for you to find endless upcycling ideas, unique ways to use vintage finds and oodles of helpful tips and tricks for painting, crafting and recreating. I am so happy you are here and can’t wait to see what you create!
Continue reading about me here!