Galvanized metal has become quite popular in the last little while and I personally love the look of it. I have developed a real love for what I like to call the “Farmdustrial” look 😉 Farmhouse combined with industrial. I love the look of the old, worn chippy paint alongside functional, industrial pieces that would have been used in everyday life.
Since I live in a completely urban setting and have only balconies at my house, they are my outdoor living space. I have been itching to give them a good redo for a couple of years now and finally started the process this summer. The main balcony is big enough that I can have plants on it as well as an area to work. Part of my plan, since it has to be a functional space as well as relaxing and pretty is to use metal and/or galvanized pots for the plants. These will help to give it a more cohesive and pulled-together look.
I have found a couple of pieces this summer that I love, but need more.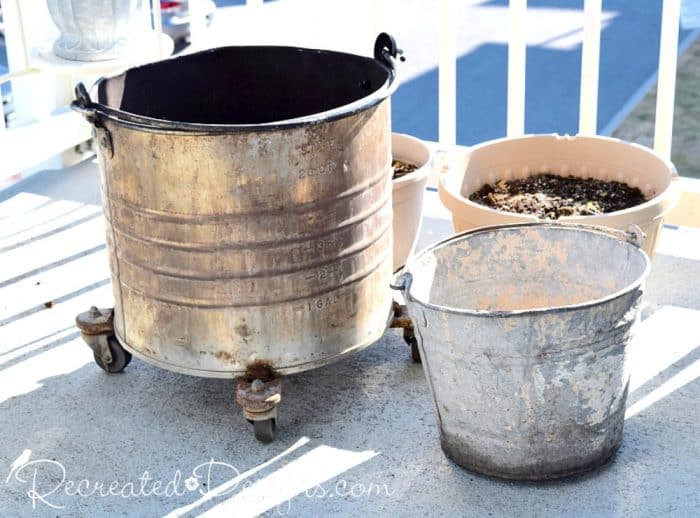
Enter the green, metal bucket. We have had this bucket for years at our cottage and I think at one point it was used as a trash can. It is metal… but not exactly what I was looking for.
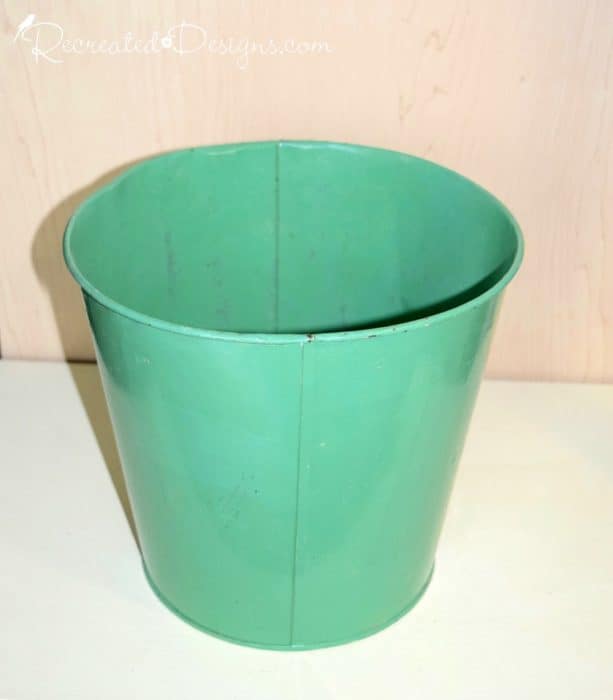 Since the green pail was still usable, but not the galvanized metal I wanted, I decided to paint it to look like it was.
Galvanized metal is just steel with a coat of zinc oxide on it. The zinc oxide is what helps to give it that pretty layered look and depth. How hard could it be to paint that??
To undertake that task, I began by painting the entire pail with Fusion Mineral Paint in Ash. The Ash provided a nice, rich, grey background. (Sorry… I forgot to take a picture of the pail with just the Ash on it. Oops!)
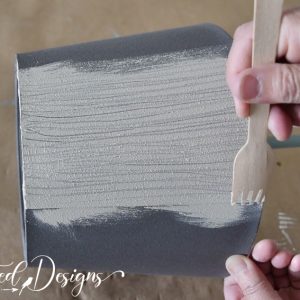
 To get that same depth as you see on the real thing, but with paint, I used a mix of Fusion Mineral Paint in Sterling with a little Coal Black and Casement. I dabbed the black and white on with a chip brush first and then a mix of greys over top.
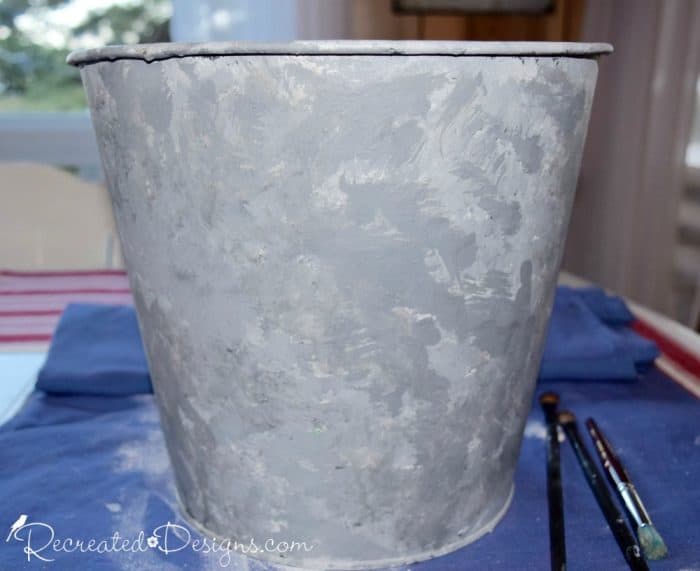 When the layers of paint were dry, it looked a little choppy up close. From further back though it was perfect. Tip: Don’t over-paint it… it is easy to do so keep taking a step back and take a look from a distance.
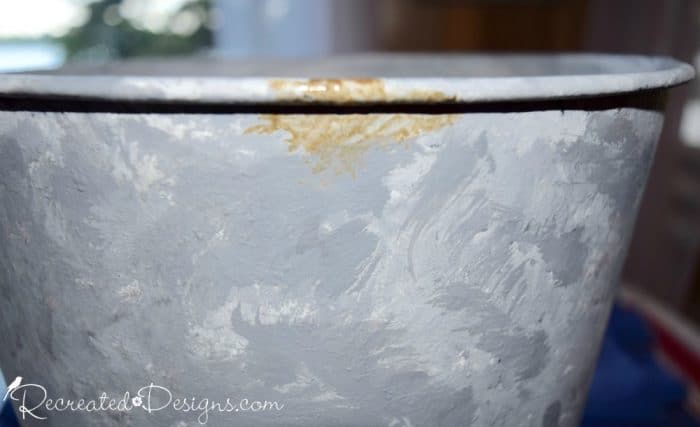 To take it one step further, and really make the pail look authentic, I dabbed on the smallest amount of Fusion Mineral Paint Antiquing Glaze. Once it was dry, it looked like rust! I added the antiquing glaze only around the top and bottom rims and the side seam; places that would normally have a little rust if it was old. Faux rust… how cool is that??
The pail is turning out beautifully but it’s not quite done yet.
Stay tuned and Thursday I will show you how I finished it off and of course, what it looks like now!
If you would like to see the Facebook LIVE demo of how to use this technique, you can find it here…
Pin for later…
**Please note that this post includes affiliate links, for your convenience, for products that are used in this project that I have tried and use regularly. By using the link, it in no way increases the cost of the product to you should you choose to buy. However, by using the link, a small portion of the sale is given back to me to help fund this blog.**


gorgeous ! what a neat technique, I can think of so many ways to use this in DIY projects!
Thank you so much, Kathleen! It was a fun project 🙂
That is such a cool idea!
Thanks so much, Kathleen! 😉
Your faux galvanized bucket turned out really nice! I’ve painted a couple this way but didn’t think about adding some paint to look like rust. Like that idea! May go back and do that to my pails.
Thanks Linda! It take a long time for them to rust naturally but I just love that little bit of “colour” to make them look a little more authentic. Have fun with your pails 😉
Hi, I'm Lisa!
Welcome to Recreated Designs... A place for you to find endless upcycling ideas, unique ways to use vintage finds and oodles of helpful tips and tricks for painting, crafting and recreating. I am so happy you are here and can’t wait to see what you create!
Continue reading about me here!