Do you have any old light fixtures kicking around that you don’t know what to do with? Maybe from your dining, living room, or entryway? If so, don’t get rid of them yet… especially if you love birds as much as I do 🙂
I found this old light fixture at the dump Reuse centre last summer and loved its lines and curves. At first, I thought I would find a place to use it at my house but that plan went out the window when I dropped it and broke the glass insert! Oops! Sadly, I have a terrible habit of dropping things… all. the. time!
After Plan A came to a crashing halt, it was onto Plan B and Plan B was to turn it into a bird feeder. I have turned a few chandeliers into things before and most recently turned this one into a bird camp for my book. This one would be a little different though.
Removing the Wiring
Normally to start, I would remove all of the wirings but someone had already kindly removed them so there was very little I needed to do for prep. If you are using one that you have at home though, you will need to carefully remove all of the electrical wirings. You can snip them with wire snips or pull them through but just remember to only do it when the light is NOT plugged in or attached to anything!
Filling the Hole
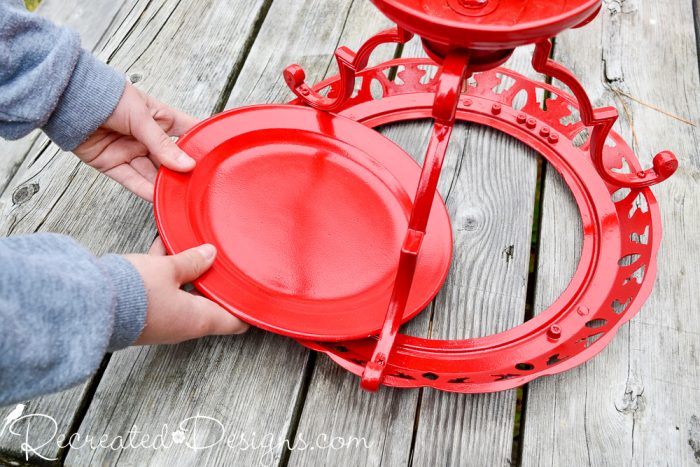
Since I had broken the glass, I needed something to fill the hole. I took the frame to the Reuse centre the next time I went and worked my way through a stack of plates. Thankfully I found one that was small enough to slip in and large enough not to fall through.
Painting the Fixture and Plate
With my fixture and plate ready to go, I gave them both several thin coats of beautiful red spray paint. Remember when spray painting that thin, light coats – letting them dry in between each – are much better than a thicker coat. This will keep the paint from dripping and looking like a sloppy mess.
Adding a Loop and Hanger
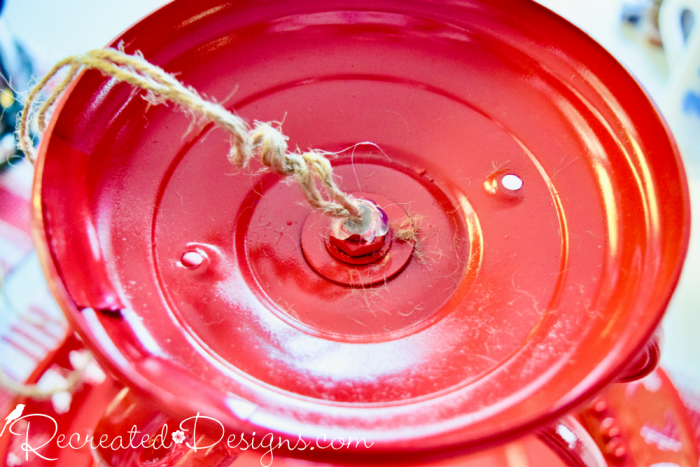
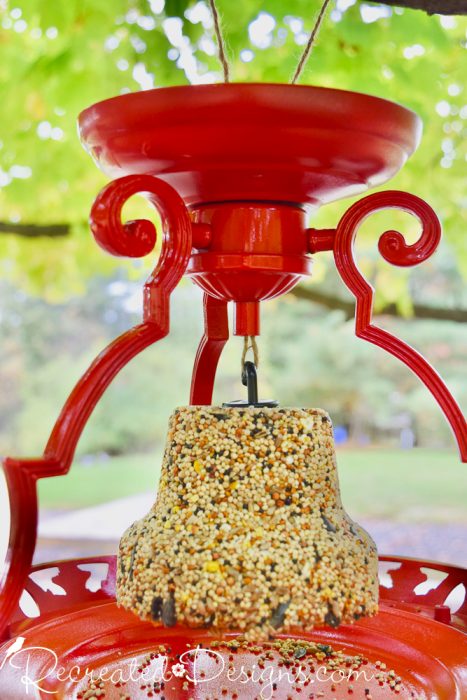
For my particular fixture, I wanted to hang a bell of birdseed. I didn’t want to dump it on the plate in case it got wet and soggy. Since there was no loop to hang a bell from, I thread a piece of doubled-up twine through the former wire pipe. I pulled it about a half an inch out the bottom and then added hot glue around the top so that it wouldn’t pull back through. If you are going to place your birdfeeder in a spot that is protected though, you could fill the plate with bird food instead of hanging something.
Adding the Plate
I decided not to adhere the plate to the fixture for my feeder. This will allow me to remove it and clean it. If your fixture has a glass bottom or you prefer to have it together in one piece, you can always adhere the glass or plate with glue.
Hanging the Bell and Feeder
All that was left to do was hang the bell and the feeder. The bell was easily hooked to the twine loop and then I chose a branch to tie the remaining twine around.
Unfortunately, it started pouring just as I got the feeder hung so I didn’t have a chance to wait for the birds. Hopefully, when I am at the cottage next I will be able to get some pics of the birds enjoying it!
The next time you change out your lights don’t throw them out! Think of how great they might look as a cheery, cherry red bird feeder!





This is such a clever idea!
Thanks so much 🙂
Great idea.
Thanks so much Linda 🙂
Your bird feeder turned out really well. I love the red, and the bell looks great. I’m wondering if the top part of the fixture could’ve been turned upside-down so that it wouldn’t collect water when it rains, or attract mosquitoes when water is present?
This a great point! I don’t think I could turn it around (it wouldn’t sit properly) but filling it in would be a great idea so that the water doesn’t pool there! I will have to keep an eye on it to see if it drains out or fills out and then figure something out. Thank you so much for pointing that out!! 🙂
Hi, I'm Lisa!
Welcome to Recreated Designs... A place for you to find endless upcycling ideas, unique ways to use vintage finds and oodles of helpful tips and tricks for painting, crafting and recreating. I am so happy you are here and can’t wait to see what you create!
Continue reading about me here!