Living in the capital of Canada certainly has its perks and I love being in the city almost as much as I love being at the cottage. One of the major drawbacks though is that I have no yard! Nope, not even a single square inch. (that is probably why I love being at the cottage so much!) What I do have though are two balconies.
While I am thankful for my balconies, they can become a bit of a chore to keep up. The one that I use the most is off of my kitchen and work area and I look at it daily. Where I do most of my writing is directly inside the sliding doors, so I spend hours looking out at this balcony. And I hate to say it but… it has become a mess lately. Like seriously messy.

With Spring *kind of* here… I decided this was the year to give that balcony a makeover and make it look pretty. I had hoped to start cleaning and painting the larger pieces but unfortunately, we have had a couple of frost warnings this week and it has been quite chilly. In spite of that, I did get started on the clay pots though.

Wanting to make the space a little more natural feeling, I painted all of the pots in shades of blue, green, and grey. I used Milk Paint by Fusion on them in these colours: Terrarium, Poolside, Coastal Blue, and a mix of Gotham Grey and Velvet Palm.
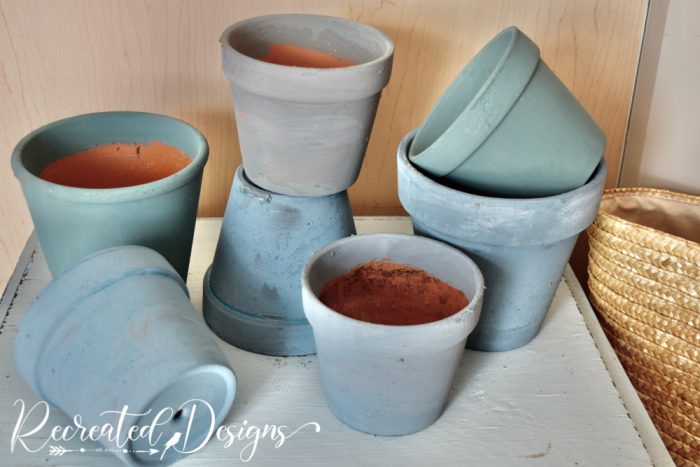
Each clay pot got one coat of paint and then a coat of Tough Coat in Matte. The Tough Coat is a clear coat that will protect the pots and the paint nicely when they are out in the elements.

For now, the painted pots and plants will have to stay inside until it warms up but I am hoping by the weekend I can get started and move them out.
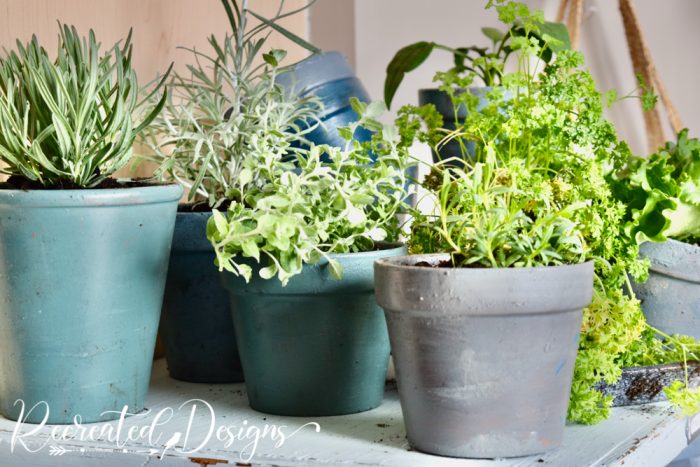
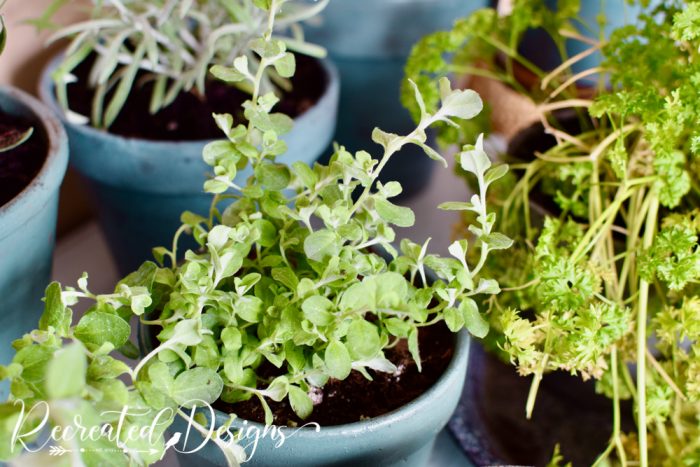
Until then, I’ll enjoy the pretty colours and how lovely the pots look painted. I am so glad I was able to get that much done at least.
Milk Paint Tips
Does Milk Paint seem a little intimidating to you? If so, you are not alone! Check out this week’s DIY Tip of the Day Video. It’s all about Milk Paint and is filled with tips to get you started. Just click the picture below and it will take you right to the video…

**Please note that this post includes affiliate links for your convenience. All links are for products that I have tried and use regularly. By using the link, it in no way increases the cost of the item to you should you choose to purchase. However, by using the link, a small portion of the sale is given back to help fund this blog. Thank you and Happy Creating! **


What a great idea to refresh clay pots! Thank you for showing pictures with the Tough Coat. Ve only ever used milk paint on wood surfaces, so this is now on my crafting bucket list!
You are most welcome Christina! I actually just fished redoing one of my bathrooms with Milk Paint as well and it worked beautifully on the cabinets and the counter 🙂
I love how you said “spring is kind of here”. Same outside of Ottawa – my garlic surfaced about a month ago but with the recent temps, if the plants could talk, they’d be saying “abort, abort!”. The weather now looks good though! Love the pots you painted – inspirational for me! Thanks!
LOL, it is soo true Beverly! Abort is exactly right 😉 I am so hoping I can get them outside this weekend though… and hopefully, they can stay out once they get there haha.
Hi, I'm Lisa!
Welcome to Recreated Designs... A place for you to find endless upcycling ideas, unique ways to use vintage finds and oodles of helpful tips and tricks for painting, crafting and recreating. I am so happy you are here and can’t wait to see what you create!
Continue reading about me here!