Last Friday when I did my latest Facebook Live for Hometalk I switched the location in which I filmed it. For this last demo, (making a Spring wreath out of a Thrift store frame) I shot the Live in front of a wall that had two pieces of reclaimed wood and a book page flower on it. Many of you noticed the book page flower behind me and sent requests for directions on how to make it.
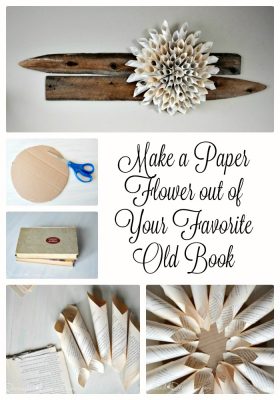
The book page flower is one of my favourite decor pieces in my home and I am happy to give you the directions on how to make your own. I find the flower striking against the reclaimed wood and it makes me smile every time I look at it.
Here is how you can make your own book page flower… 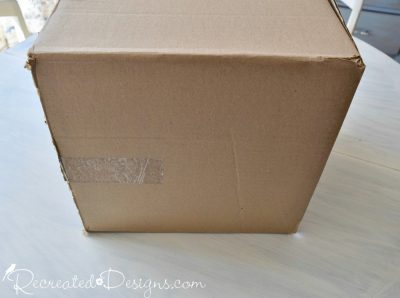 Grab a cardboard box. You will need this to make the backing to build the flower on.
  Draw a large circle on one side. I used a large Tupperware bowl so I would get a nice even circle.
 Cut out the circle.
  I didn’t paint the circle for my flower because it is very full however, if you are worried about seeing the back, you can paint it an off-white colour to match the book pages.
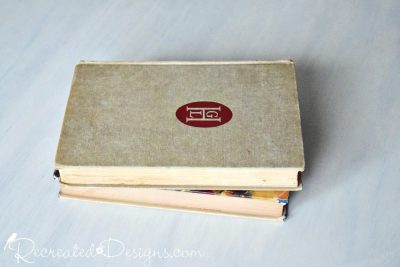 Pick up an old book at a thrift store or use an old favourite.
  Using a knife blade, slice along the edge of the pages to remove them from the book.
  Depending on how full you want your flower, you will need 30 – 50 pages.
 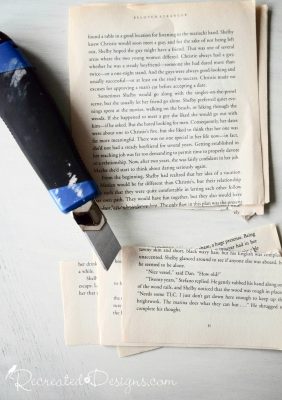 Slice the bottoms off. You don’t want squares but if the pages are too long, you won’t get a nice cone.
  Roll each page into a loose cone.
 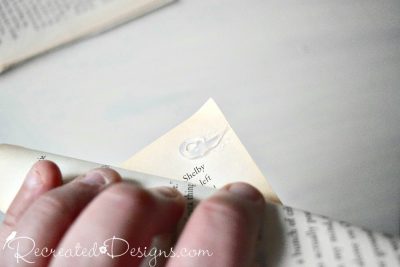 Add a dab of hot glue to hold the cone closed.
 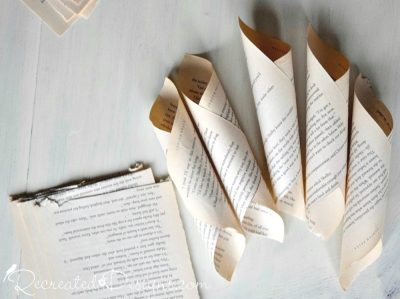 Making a bunch of cones at once, before you begin the flower, will make it easier.
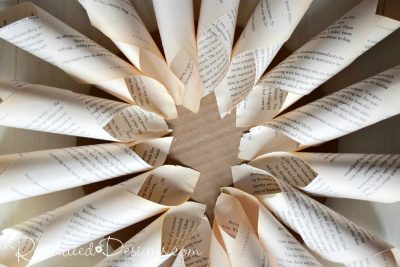 Make your flower in layers. Add a dab of hot glue to one end and attach the cone to the cardboard. Fill in the spaces with each new layer.
  When you get to your last layer, crinkle up a page and glue it onto the centre to finish off the flower.
  Attach a piece of string to the back of the cardboard with some hot glue. Now you are ready to hang your new book page Chrysanthemum.
  I hung mine over two pieces of reclaimed wood and I love how the colour of the old book pages looks against the wood. You can see a larger picture of it in my Holiday House Tour from this past Christmas here…
I would love to see pictures of where you hang yours! Upload them to the Recreated Designs Facebook page.
Pin for later…
To see where I like to party and link up my posts, click here…


Love it. Do you roll the rolls a little tighter as you start getting to the center?
Hi Cindy, Thanks 😉 Yes, I do usually roll them a little tighter as they start to get closer and closer to the centre.
What was the diameter of the circle you used?
Hi Rosalie. The one I used in the photo was 10″ wide or so.
Such a beautiful design and I love the idea of my favourite old book being recreated, but still being part of my world. Thank you!
😉 Thank you so much Petra! That was my favourite thing when I made it as well… I could use a book that I loved and still keep it in some form in my house.
This is so unusual, and pretty! one question..do the layers following the first, largest glue to the backing, or to each other, or both?
Thanks Ella! They do follow the same way as the first. The end of each cone gets glued to the cardboard circle. As it fills in, they will begin to turn upwards filling in the flower as you add layers. Hope that helps!
Beautiful idea and perfect outcome! I love how you attached it to reclaimed wood turning it to nice vintage style décor piece. Visiting from Home Talk
Thanks so much Sarune! I love how to flower pops against the wood too… it is definitely one of my favourite things <3
This is lovely Lisa. Several years ago, I created a similar wreath out of vintage sheet music. I’ve really enjoyed it and I love the way you have yours displayed. Thanks for sharing @Vintage Charm. Pinned!
Oh that would be beautiful as well Cecilia! I love the look of old sheet music too <3 Thanks so much for taking the time to stop by and for sharing.
Beautiful flower! Love it teamed up with those old wood slats!
Thanks so much Heidi!
Super pretty wreath, especially on those pieces of wood. No wonder folks were asking you how to make it! Visiting from Funtastic Friday party.
🙂 Thanks so much! It is one of my favourite pieces in my home <3
Hi, I'm Lisa!
Welcome to Recreated Designs... A place for you to find endless upcycling ideas, unique ways to use vintage finds and oodles of helpful tips and tricks for painting, crafting and recreating. I am so happy you are here and can’t wait to see what you create!
Continue reading about me here!