Today I am teaming up with some great bloggers to bring you all things Christmas DIY! If you are hopping over after a visit with Sara at Twelve on Main… thank you for stopping by and welcome!
Christmas will be here before we know it so we wanted to make things fun and get your creative juices flowing. You can check out all of their great projects at the end of my post and hop over to their blogs to see what else you can make this holiday season.
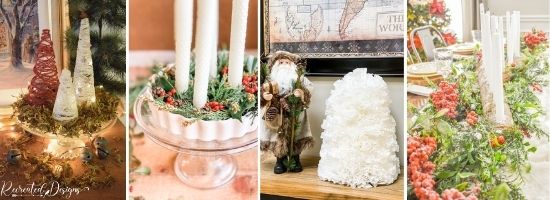
For my Christmas DIY project, I made my annual trees. I love the outdoors so much that every year I make a new type of tree to decorate with. I have made felt trees, paper trees, and even a forest of trees so this year I decided to make string trees.
These little string trees really are quick and simple to make but, be warned, they are a little messy 😉
Prepping to Make the Trees
To get things ready to make your new trees, first make a cone out of several pieces of paper. I made three different sizes so that I could have a variety of trees.
Pull the paper tight to make narrow trees or let it out to make fatter trees. Once you have the cone in the shape you like, tape the edge to keep it together and then trim the bottom so that it sits level on your table.
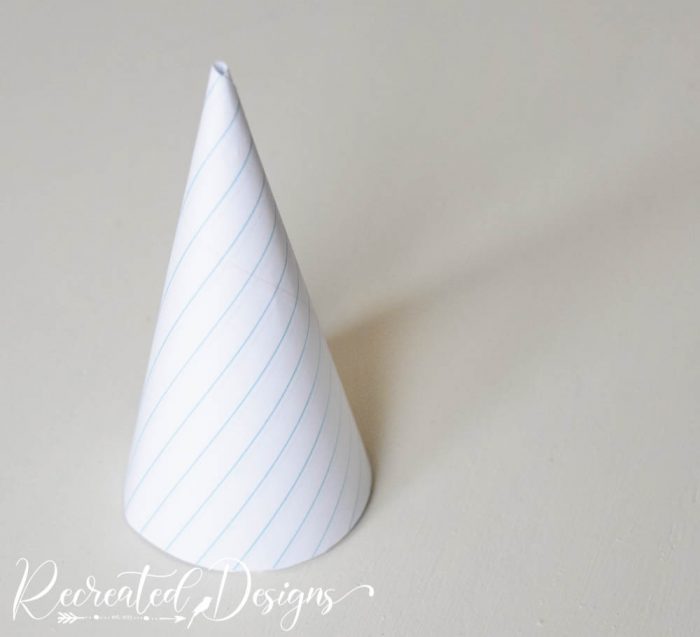
Next, cover your cone in plastic wrap. Don’t worry about making it smooth as the string will cinch it in when you are wrapping it. Tuck the plastic wrap under the bottom of the cone to hold it in place.

Making the Trees
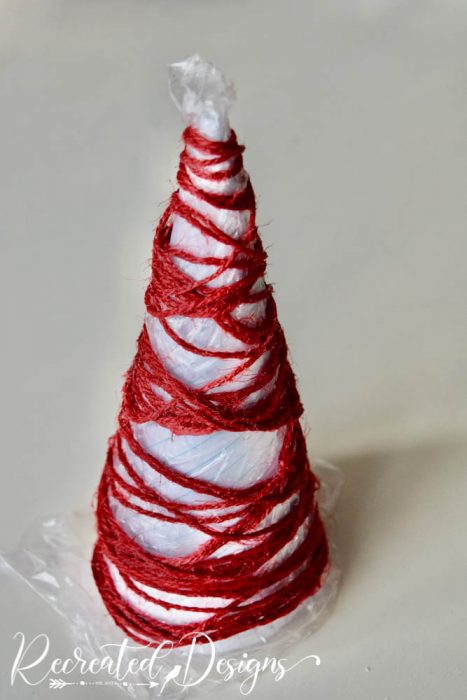
Now comes the messy… I mean… FUN part! Take a length of string and soak it in Mod Podge. I used Matte Mod Podge for my trees and used both white and red string.
How much string you will need will depend on the size of your trees, the thickness of your string, and how dense you want them. Start with a good amount of string and if you run out, you can soak more. I did not cut my sting, as I figured I would need more, so this way it was one continuous piece.

With the string soaked in the Mod Podge, start wrapping the cone. You can start anywhere but be sure to wrap the bottom several times to give it a nice sturdy base. Wrapping the cone in a random pattern will give you tree a more natural look.
Keep adding string and wrapping the cone until you have the thickness you want.

Finishing the Trees
Leave your trees to dry overnight or until the Mod Podge is crispy and hard.
To finish your trees, remove the paper cone first.
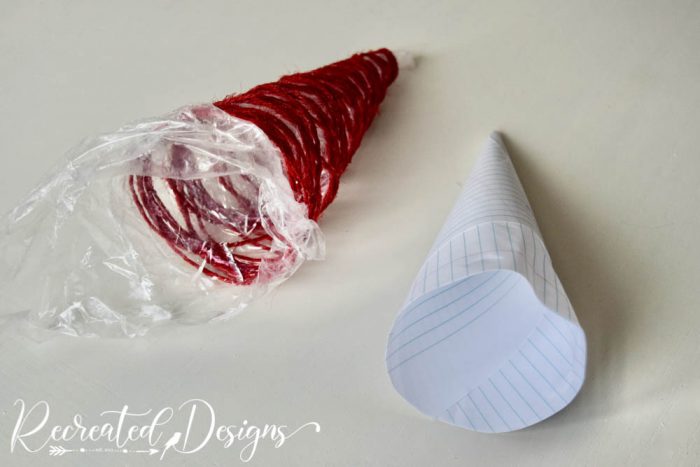
Next, carefully peel away the plastic wrap from the dried string and Mod Podge. If it is sticking to the top of the tree, use a butter knife to carefully peel it off.


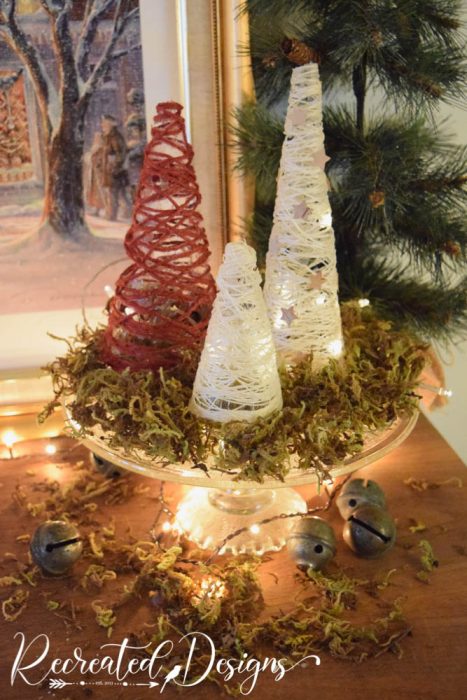
Once your trees are free from the cones, you can display them as is or add some embellishments. You can even paint one of these gorgeous shades of green if you used a white string: Terrarium, Vintage Laurel or Velvet Palm.
I added little Birchbark stars to one of my trees and love how cute they look. A little dab of glue held each star in place perfectly.

When I was done with my trees, I slipped some twinkle lights inside to give them a little extra sparkle and surrounded them with some beautiful moss.
These little trees are so easy to make and there are so many things you can do with them. The possibilities are endless and they make the perfect addition anywhere you need a little rustic touch.


Hearth and Vine / The Little by Little Home / the Gal Down the Road

The Homemaking Momma / Emily’s Project List / Twelve on Main
Recreated Designs / Roots and Boots / At Lane and High / Jenron Designs


Lisa,
These are so creative! And I love how you have them displayed with greenery and lights.
Thank you so much Leigh! They were fun to make 😉
I love this idea and they are so pretty with the twinkle lights!!
Aww, thanks so much 😉
I have always wondered how to get the string to stand on it’s own like that! Such a cute way to create a forrest! I can’t wait to give it a try.
Thanks so much Wendy! Even if they were a little messy to make they were really easy and fun 🙂
What a great idea, I have so much yarn that I have have been storing and not using. I should really try to do something like this with it! Thank you for the inspiration!
You are most welcome. They would look great out of yarn… there are so many beautiful patterns and thicknesses that you could make all kinds of trees 🙂 Have fun!
So pretty and simple. The possibilities are endless aren’t they? Can’t wait to make these!
Thank you so much and yes, I keep thinking of more things I could do to them. Making some more is going to be a must for me LOL.
These are really cute. What a great idea 🙂
🙂 Thank you so much!
These are so pretty and I love the way you styled them together in a group. I can see all kinds of ways you could decorate with this idea. Brilliant!
Aww, thanks so much Patti! You are so right… there are just so many things you can do with them!
This is such a sweet idea and so simple to make. Thanks for sharing.
Thanks so much Louise!
Hi, I'm Lisa!
Welcome to Recreated Designs... A place for you to find endless upcycling ideas, unique ways to use vintage finds and oodles of helpful tips and tricks for painting, crafting and recreating. I am so happy you are here and can’t wait to see what you create!
Continue reading about me here!