Who doesn’t need a memory board or two in their house?
I have one that I got a few years ago in my work area that I use as a dream board. I wanted another one though to use for personal pictures and letters that are special.
Here’s how you can make your own pretty memory board… Start with a large salvaged or reclaimed frame.
I got this large oak one at a thrift store for $8. 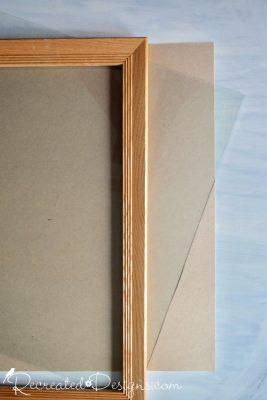 Take the frame apart and keep all of the pieces.
 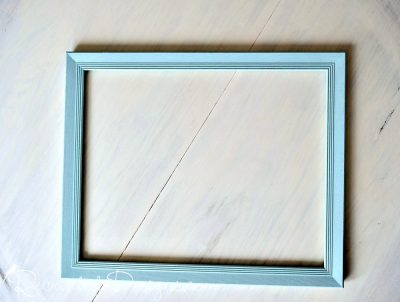 Paint the frame.
My frame got two coats of Country Chic Paint in Ocean Breeze. I. Love. This. Colour! It is the perfect, summery, gorgeous blue!
After the paint was dry, I lightly distressed the edges and then gave the entire frame a coat of Hemp Oil to protect it.
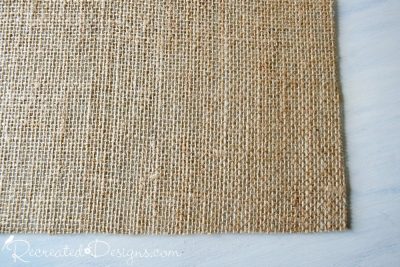
 To make the backing of the board, cut a [easyazon_link identifier=”B009K4MTII” locale=”US” tag=”recredesig20-20″]piece of burlap[/easyazon_link] slightly bigger than the glass.
Don’t forget to iron out all of the wrinkles 😉
 Using [easyazon_link identifier=”B001689P10″ locale=”US” tag=”recredesig20-20″]spray adhesive[/easyazon_link], coat one side of the burlap and one side of the glass from the frame.
 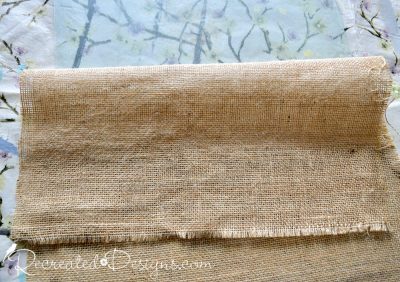 Wait for one minute and then begin rolling the burlap out over the glass. Make sure the sticky sides are touching.
  Once the burlap is in place, turn it burlap side down and leave it to dry for a couple of hours. Place something heavy on top of the glass to weigh it down while drying.
 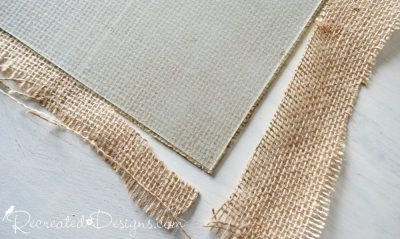 Trim off the excess burlap.
 When you are done, the burlap should be firmly glued in place and exactly the size of the glass from the frame.
  Attach three pieces of [easyazon_link identifier=”B00WHXQIJA” locale=”US” tag=”recredesig20-20″]Jute twine[/easyazon_link] around the glass and burlap. These will be to hang your pictures and letters on. To keep them in place while you are assembling the board, tape the ends to the glass.
 Put the glass back into the frame with the burlap side out.
When taking apart my frame, I had to remove the staples they had holding it all together. To get the new memory board to stay in place, I used a [easyazon_link identifier=”B0009ILFBG” locale=”US” tag=”recredesig20-20″]picture framing fitting tool[/easyazon_link] to add metal brads.
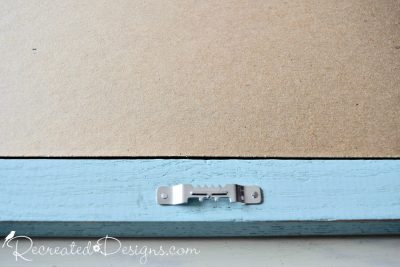 If your frame does not have a way to hang it, add a picture hanger to the top on the back.

 To finish off the memory board, add small, wooden clothes pins to use for hanging pictures and mementos.
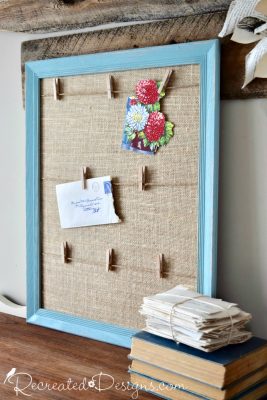 I am not only completely in love with the blue paint in and of itself, but, combined with the burlap, my heart skips a beat ♥
If you would like to receive Recreated Designs projects and finds as they are posted, I would love to have you join me on my journey.
You can sign up here…
Pin for Later…

*Please note that this post contains Affiliate Links. By using the link, it in no way increases the cost of the product to you should you choose to buy. However, by using the link, a small portion of the sale is given back to me to help fund this blog.*


You amaze me. You have the best ideas!! I LOVE the memory board and the color. ANOTHER wonderful project. Please, keep ’em coming.
Aww thanks so much Rebecca. That is so sweet! And I’m so glad you like the memory board – I have been using that blue a lot this Spring… I am completely in love with it 🙂