Did you catch the resin project I did a couple of weeks ago with a vintage side table? (you can see it here…) Well… I had some resin left over so decided to make some fun coasters with ceramic tiles and fabric.
I used two different fabrics as an experiment to see which worked better.

The first was a flannel buffalo check.

The second was a fun tea-time cotton from Spoonflower.
Prep

I started by measuring and cutting out a square that was an inch bigger than the tile on all sides.
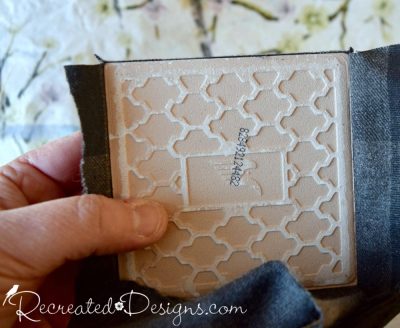
I did the next step in two different ways. For two of the tiles, I used a spray adhesive to adhere the fabric to the tile. For the others, I used a coat of Mod Podge to adhere them.

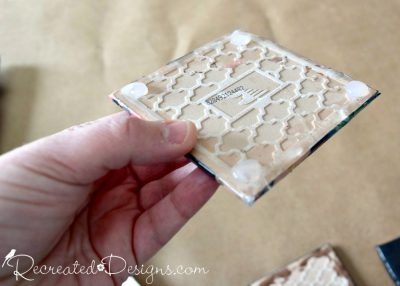
For the ones I used a coat of Mod Podge, I also put two coats of it on top of the fabric as well to seal it. Sealing it before the resin step helps to protect the look and colour of the fabric.
If you don’t seal the fabric with Mod Podge before the resin, the resin will soak into the fabric and change the colour.
I definitely ended up preferring this method to the spray adhesive with no sealing. The colours were much truer and the look was overall nicer.
Resin

Next, it was time to pour the resin; follow the instructions on the box to mix and remove bubbles. I used an old cookie tray and some plastic cups to make sure the coasters were raised up. The resin will need to drip off of the sides in order to form a nice smooth top surface.

When the resin was mixed and ready, I poured it on carefully and used a straw to gently blow out any bubbles.

Every half hour or so I used a popsicle stick to wipe away any drips that had formed on the underside of each tile. If you miss any, they can easily be sanded away once the resin is fully cured.
To finish off the new coasters, I added four little “feet” on the bottom of the tile. A dab of hot glue in each corner did the trick.

Use your favourite fabric and resin to make fun coasters great for a warm cup of tea.

I was really, really happy with how well the tea time fabric turned out. The cotton stayed beautiful and crisp under the Mod Podge and Resin. The flannel fabric worked well with the Mod Podge as well, but not without.
Using bright, colourful patterns definitely works better for this project.

I love that there are so many options with this type of project! You could use photos, your favourite saying, or fabric to match your decor. The possibilities are really endless.

Be sure to follow along on Facebook and Instagram as well for more inspiration and step-by-step projects.
Don’t forget to check out the new Recreated Designs online shop and retail location!
**Please note that this post includes affiliate links. By using the link, the cost does not increase and a small portion of the sale is given back to help fund this blog. For your convenience, you can also find all of my favourite DIY products here. Thank you and Happy Creating! **
Pin for later…


Thanks for sharing I love this Idea. What did you use for the feet? Thanks
Thanks so much Gladys! It was a fun project. For the feet I just added a dab of hot glue in each corner. When it was dry it works great as soft, non-slip feet for the coasters.
I’m having trouble achieving a heat resistant surface using the envirotex resin on my acrylic pour coasters. . Do you have an suggestions on how to make them heat resistant?
Hi Michelle, the Envirotex Lite is supposed to be heat resistant. Hmmm… mine have been Ok so not sure what could be done to make them more heat resistant. Did they harden properly for you? Sometimes if the two components are not thoroughly mixed they don’t harden properly and make a sort of softer finish. Mine are rock hard and have held up well to heat. Was it the Envirotex Lite that you used? Sorry I can’t be of more help!!
Thank you for your response. Yes I have used Envirotex lite and even tried their product EX-74. I have mixed several sets and none of them have been heat resistant. They dry rock hard and are not sticky either. I have talked to their support 3 times and my method has been correct. I had heard about spraying engine enamel on the coasters but then you lose the beautiful resin surface.
Wow, that’s too bad. I wonder why? How frustrating that you have tried and are still not getting great results. Sorry, I wish I could be of more help. Please let me know if you figure out a way!
Thank you. How many ounces of resin do you mix up to use on 4 tiles that are 4″ X 4″?
Hi Michelle, I don’t remember the exact amount but it was no more than about 2 cups from each bottle (resin and hardener) You will have extra but that will allow it to run off the edges and make a nice smooth finish.
So cuteeeeee. I love them. Happy Holiday’s
Thanks 😉 and have a wonderful Holiday as well!! Merry Christmas!
Hi, I'm Lisa!
Welcome to Recreated Designs... A place for you to find endless upcycling ideas, unique ways to use vintage finds and oodles of helpful tips and tricks for painting, crafting and recreating. I am so happy you are here and can’t wait to see what you create!
Continue reading about me here!