With everyone cooped up inside and facing uncertain futures, we need something happy and bright to focus on for a little while to give ourselves a break. With Easter this week and warmer weather inching closer I think it’s time for a little Spring cheer… wouldn’t you agree?
Since nothing is physically open where I am, I have challenged myself to sort through and use what I have at home for my creative projects. It’s actually been fun to “shop” my house and come up with things to create using only what I have on hand. In fact… it has been so fun that I think I might make a little game of it. I am going to let you all choose what I use for a future project and get in on the fun! I will send more details on that later this week though or can you keep an eye out over on Facebook for more details.
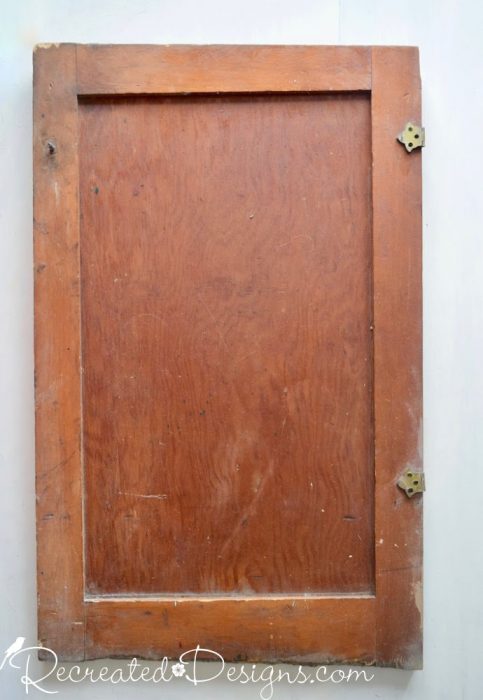
For this project, I picked some things out myself. I grabbed an old door and a new IOD mold that I had picked up, before the home confinement, and came up with something Springy that would add some cheer to my decor.
Vintage Inspired Chalkboard
A few years ago I had purchased two of these really old doors (for $2 each) and even though they were both chewed up, crooked, and holey, I instantly loved them. The wide thick moldings and wear at the bottom was charming and even though I had no idea if the wear was from continually rubbing over something or from someone nibbling on it, I loved them none the less.
I didn’t need to do much to get the door I used ready for the project except remove the hardware and give it a good cleaning with soap and water.
Once it was ready, the frame got a very light coat of Annie Sloan Chalk paint in Old Ochre with a loose, natural bristle chip brush. I wanted the paint to look old and worn so didn’t worry too much about getting it even or perfect.  For the inside of the door, I wanted it to have a vintage chalkboard look. Using two parts green Milk Paint with one part navy blue it was the perfect old-school chalkboard green colour. I also added just a little bit of Ultra Grip to the mix for added stick.
I loooove the green the combination of the two made so much so that I am thinking of adding it somewhere in my house… I’m just not sure where yet… 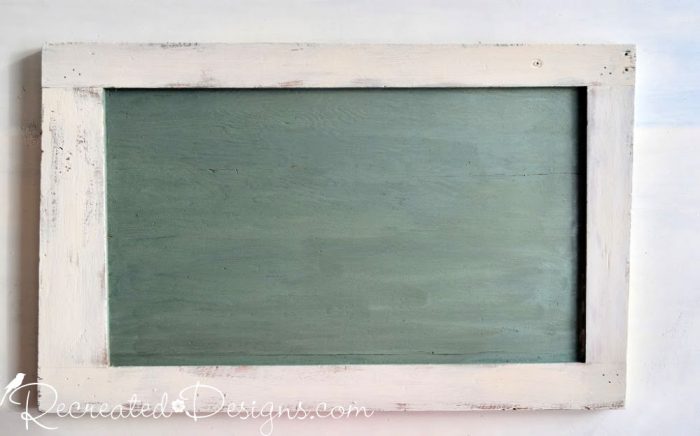
IOD Mold – He Loves Me
With the door painted and ready to go it was time to move on to the Springy part of the project. Luckily I had the He Loves Me IOD mould on hand and a package of air dry clay. If you have not used air dry clay and moulds before you are missing out! They are so much fun and there is soo much you can do with them!  I always like to dust the mould with corn starch before filling them. This will allow the clay to easily pop out of the mould when you go to remove them. This is especially important if your clay is wet and sticky.
 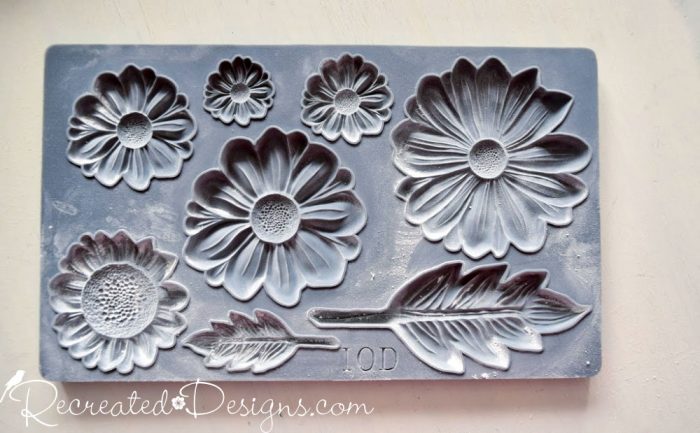 With my mould ready to go, I made several moulds of each flower and a whole bunch of leaves in both sizes. I laid them out on wax paper when I removed them from the mould to keep them flat.
Painting the Flowers
Wanting my Spring board to have a very vintagey feel, the flowers needed to have muted and worn colours. I mixed up some Milk Paint in yellow, orange, red, and pink for the flowers as well as green and some of the vintage chalkboard colour I had left for the leaves. At a ratio of 4 parts water to one part mix, there was just a hint of colour in the water and it made the paint almost translucent when brushed on.
I also brushed on some dry paint mix to add some color dimension to the flowers. While the moulds were still wet from the watery paint mixture, I dipped a small paintbrush into the dry paint mix and brushed in over parts of each flower. The chalky mix stuck to the wet surface and added some great texture and colour variation.  I should note that I painted and added the dry mix while the clay was still wet. I wanted the clay to dry with the paint on it so that the paint would seep into the clay while it was set and then they would crack together like they had aged over time.
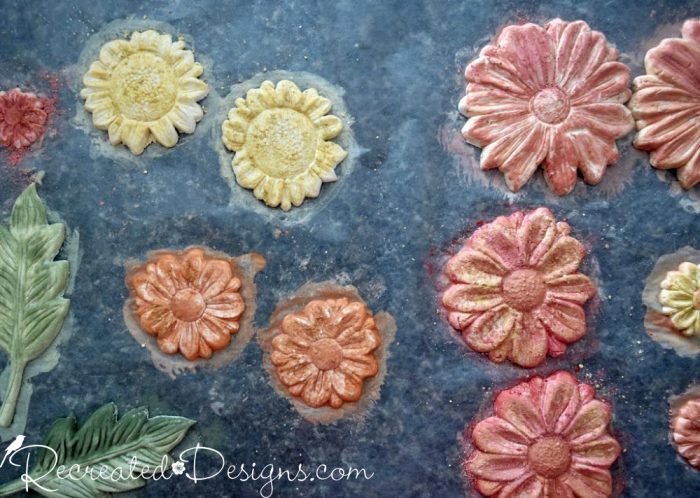
Adding the Flowers
I left the painted flowers and leaves overnight to dry. By the next morning, they were not completely dry, but enough that I could lay them out on the painted door and arrange them. Once I had them in an order I liked, I brushed on some wood glue to the back of each and stuck them onto the wood. 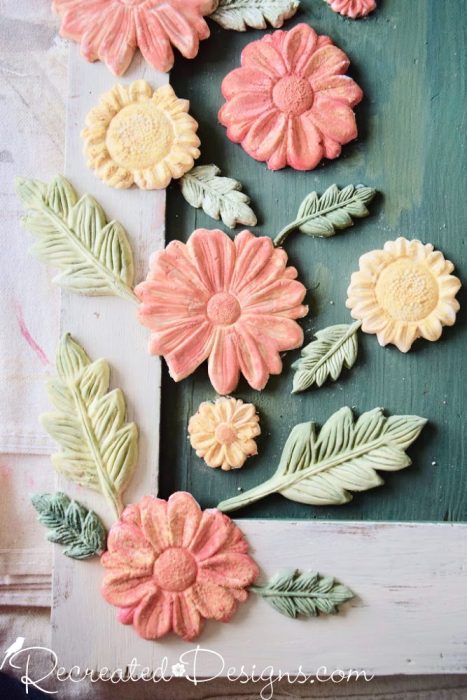 While the wood glue was drying and the door was laying flat, I finished off the leaves and flowers by adding a little bit of clear and dark wax just to highlight little bits of each one.
A Touch of Spring
I really needed this little bit of Springy cheer in my house and absolutely love the vintage feel the board has. From the distressed paint to the chintzy-looking flowers it all makes my heart happy. 
 Have you added or created things these past few weeks that make you smile and bring you some good cheer? I would love to hear and see what you have been up to. We are all in this together and that means creating together too!
Until next time, I’ll see you soon on Instagram or Facebook.


The clay flowers and leaves add the wow factor to your door upcycle! Looks great!
Thanks so much, Allyson 🙂 It makes me feel so Springy every time I look at it!
Love it all so much..the clay flowers are absolutely beautiful such talent, I look forward to seeing more of your work 💗 incredible
Thank you so much Kimberly, that is so sweet of you to say. I’m so glad you liked them!
Adorable! I’ve never heard of paper clay! I’m going to have to try that out. The way you worded this project reminded me of my kids when they were little, mainly my son. They’d ask what we were having for dinner, and I would ask what they wanted. My son would say he didn’t know. “Whatcha got?” So I’d look in the cabinets and mix some stuff up and call it whatcha got.
This is my first time coming across your blog, but THANK YOU for repurposing and recreating. I have a small business in my home now named Wild Child, but it is all repurposed. I try to educate people on not throwing away things that can be made into other things, stop filling up the dumps with clothes, etc. Many just don’t get it. Maybe they have not driven by a landfill lately. Hoping to learn much from you!
Adasha
Thank you so much Adasha for your kind words <3 I am so glad you liked the project and the blog! You are so right that people just don't realize how much ends up in the landfill that doesn't need too. It is my mission as well to save as much as I can and help others to do the same. Have fun creating and thanks again so much for stopping by!
That is amazing! Very creative and inspiring. Thanks for sharing.
Aww thanks so much Tracy! I’m so glad that you enjoyed it 🙂
Hi, I'm Lisa!
Welcome to Recreated Designs... A place for you to find endless upcycling ideas, unique ways to use vintage finds and oodles of helpful tips and tricks for painting, crafting and recreating. I am so happy you are here and can’t wait to see what you create!
Continue reading about me here!