Vintage silver plate is so common it’s become a dime-a-dozen. You see these pieces all over thrift stores and garage sales. They were so mass-produced that people have a hard time getting rid of them now.
There is typically little value to most of the silver plate pieces you find because they were made from a thin layer of silver over a base metal. Despite there being little value though they come in oodles of beautiful shapes and sizes.
I love working with silver plate pieces because of those very reasons though and grab it whenever I see it.
The Silver Plate Pieces
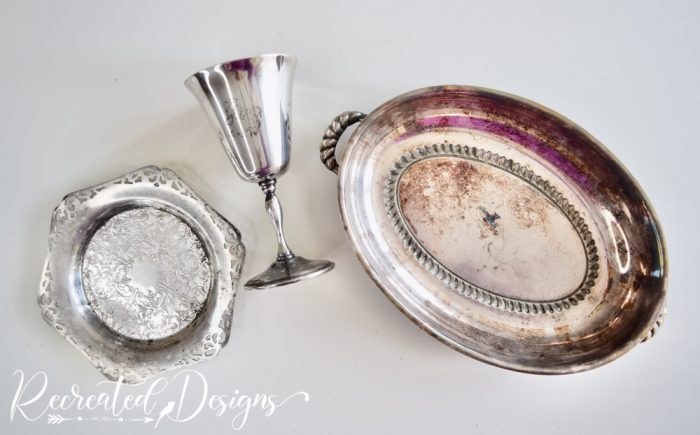
When I was looking to create something for an Easter centrepiece this week, I looked through my stash of silver plate and found these 3 random pieces. I grabbed the lid of a serving dish, an engraved goblet from the 1970s, and a small plate with pretty cutouts.
To get the pieces ready for this project they were washed with soap and water and then given a little sanding. I only sanded the spots where the epoxy would be applied; the centre of the lid, the underside of the small plate, and the top and bottom of the goblet. The sanding was to give the surface a little grit so the glue would stick well.

Building the Tiered Tray
To stick silver plate together, I find Epoxy works the best. It does a great job adhering the pieces and dries quickly.
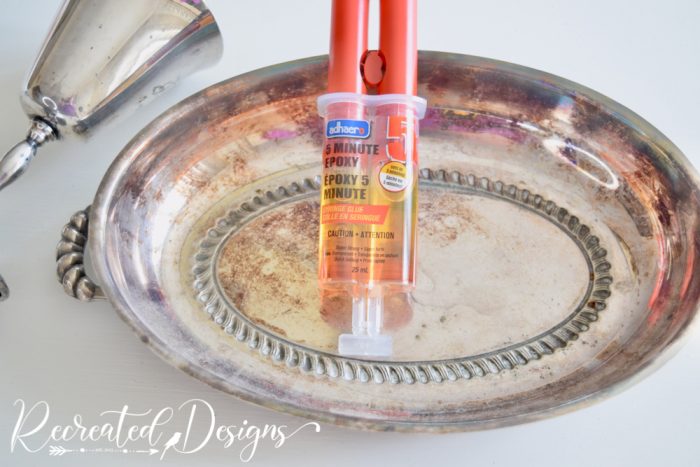
If you are applying the epoxy straight onto the pieces as I did, be sure to mix the two sides with the nozzle as you are dispensing it.
I started building my tiered tray from the bottom up. I applied the epoxy to the middle of the lid first and then laid the goblet into the glue.

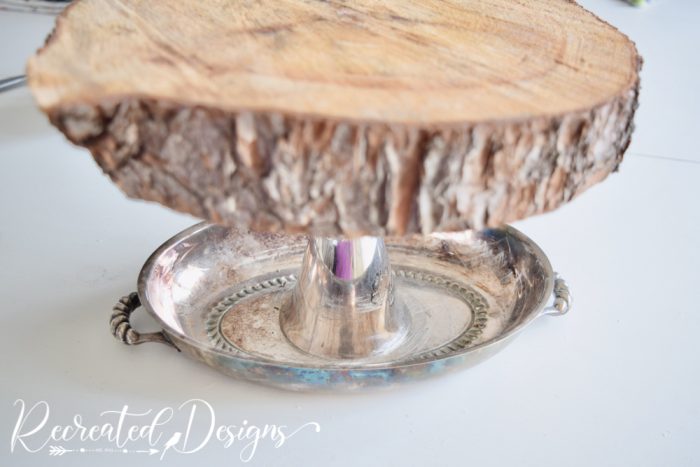
It is best to weigh down the pieces while they are drying if at all possible. I did this by laying a slice of wood on top of the goblet once they were glued together and left them for about 15 minutes.
Once the glue between the goblet and lid was dry, I added the epoxy to the underside of the small plate and adhered the other end of the goblet to it. I then put the wood slab back on top for another 15 minutes until the glue was set.

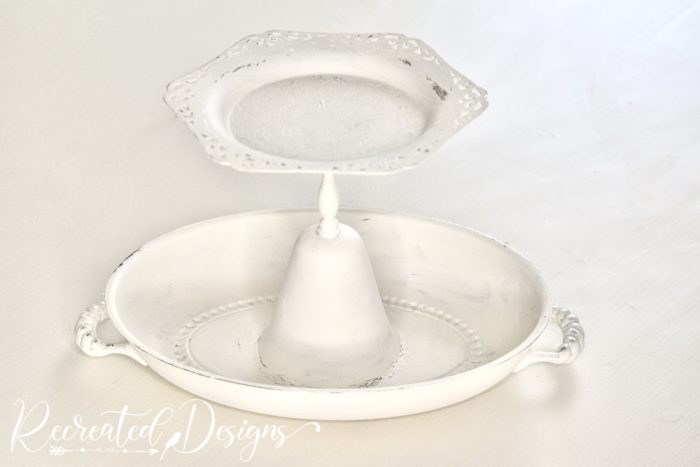
The Tiered Stand
This was the tiered stand once each piece was glued. The epoxy did an amazing job holding it all together.
I loved how pretty the silver plate pieces looked at this point. I think I am going to make another one and stop at this point leaving them silver. The patina on the pieces gives them such character.


Painting Silver Plate
For this project though I wanted something a little lighter and airier feeling. I used Fusion Mineral Paint in Raw Silk and the pieces were quick and easy to paint. To give the piece a worn and aged feel, I also did a little distressing around the edges once the paint was dry.
Styling the Tiered Stand
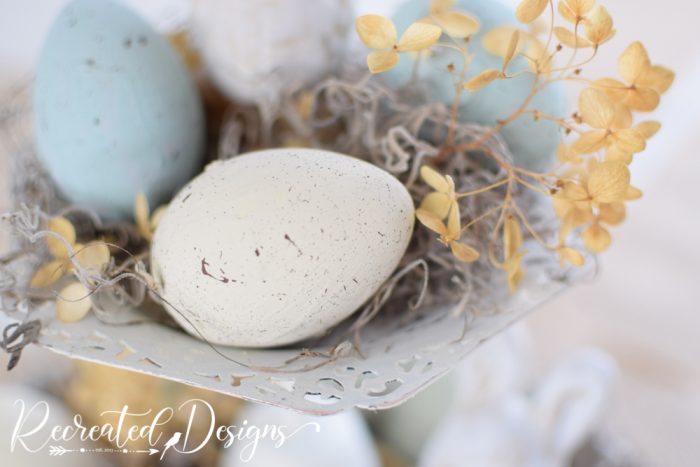
I started out making this tiered stand so that I could use it as an Easter centrepiece and styling it was just as fun as building it. I grabbed some kitchy bunnies I had thrifted and painted white, speckled eggs, beads, dried flowers, moss, and vintage thread spools.

To see how I layered everything on the tiered stand, check out the video here…

This vintage upcycle was so fun and I love that there are so many silver plate pieces out there that each time you put one of these tiered trays together, it will look unique and different.

Be sure to pop by Wednesday because even though I adore how cute the stand looks decorated for Easter, I am going to show you three more ways you can use it around your home.
See you Wednesday!